- 1
Gather Materials
1234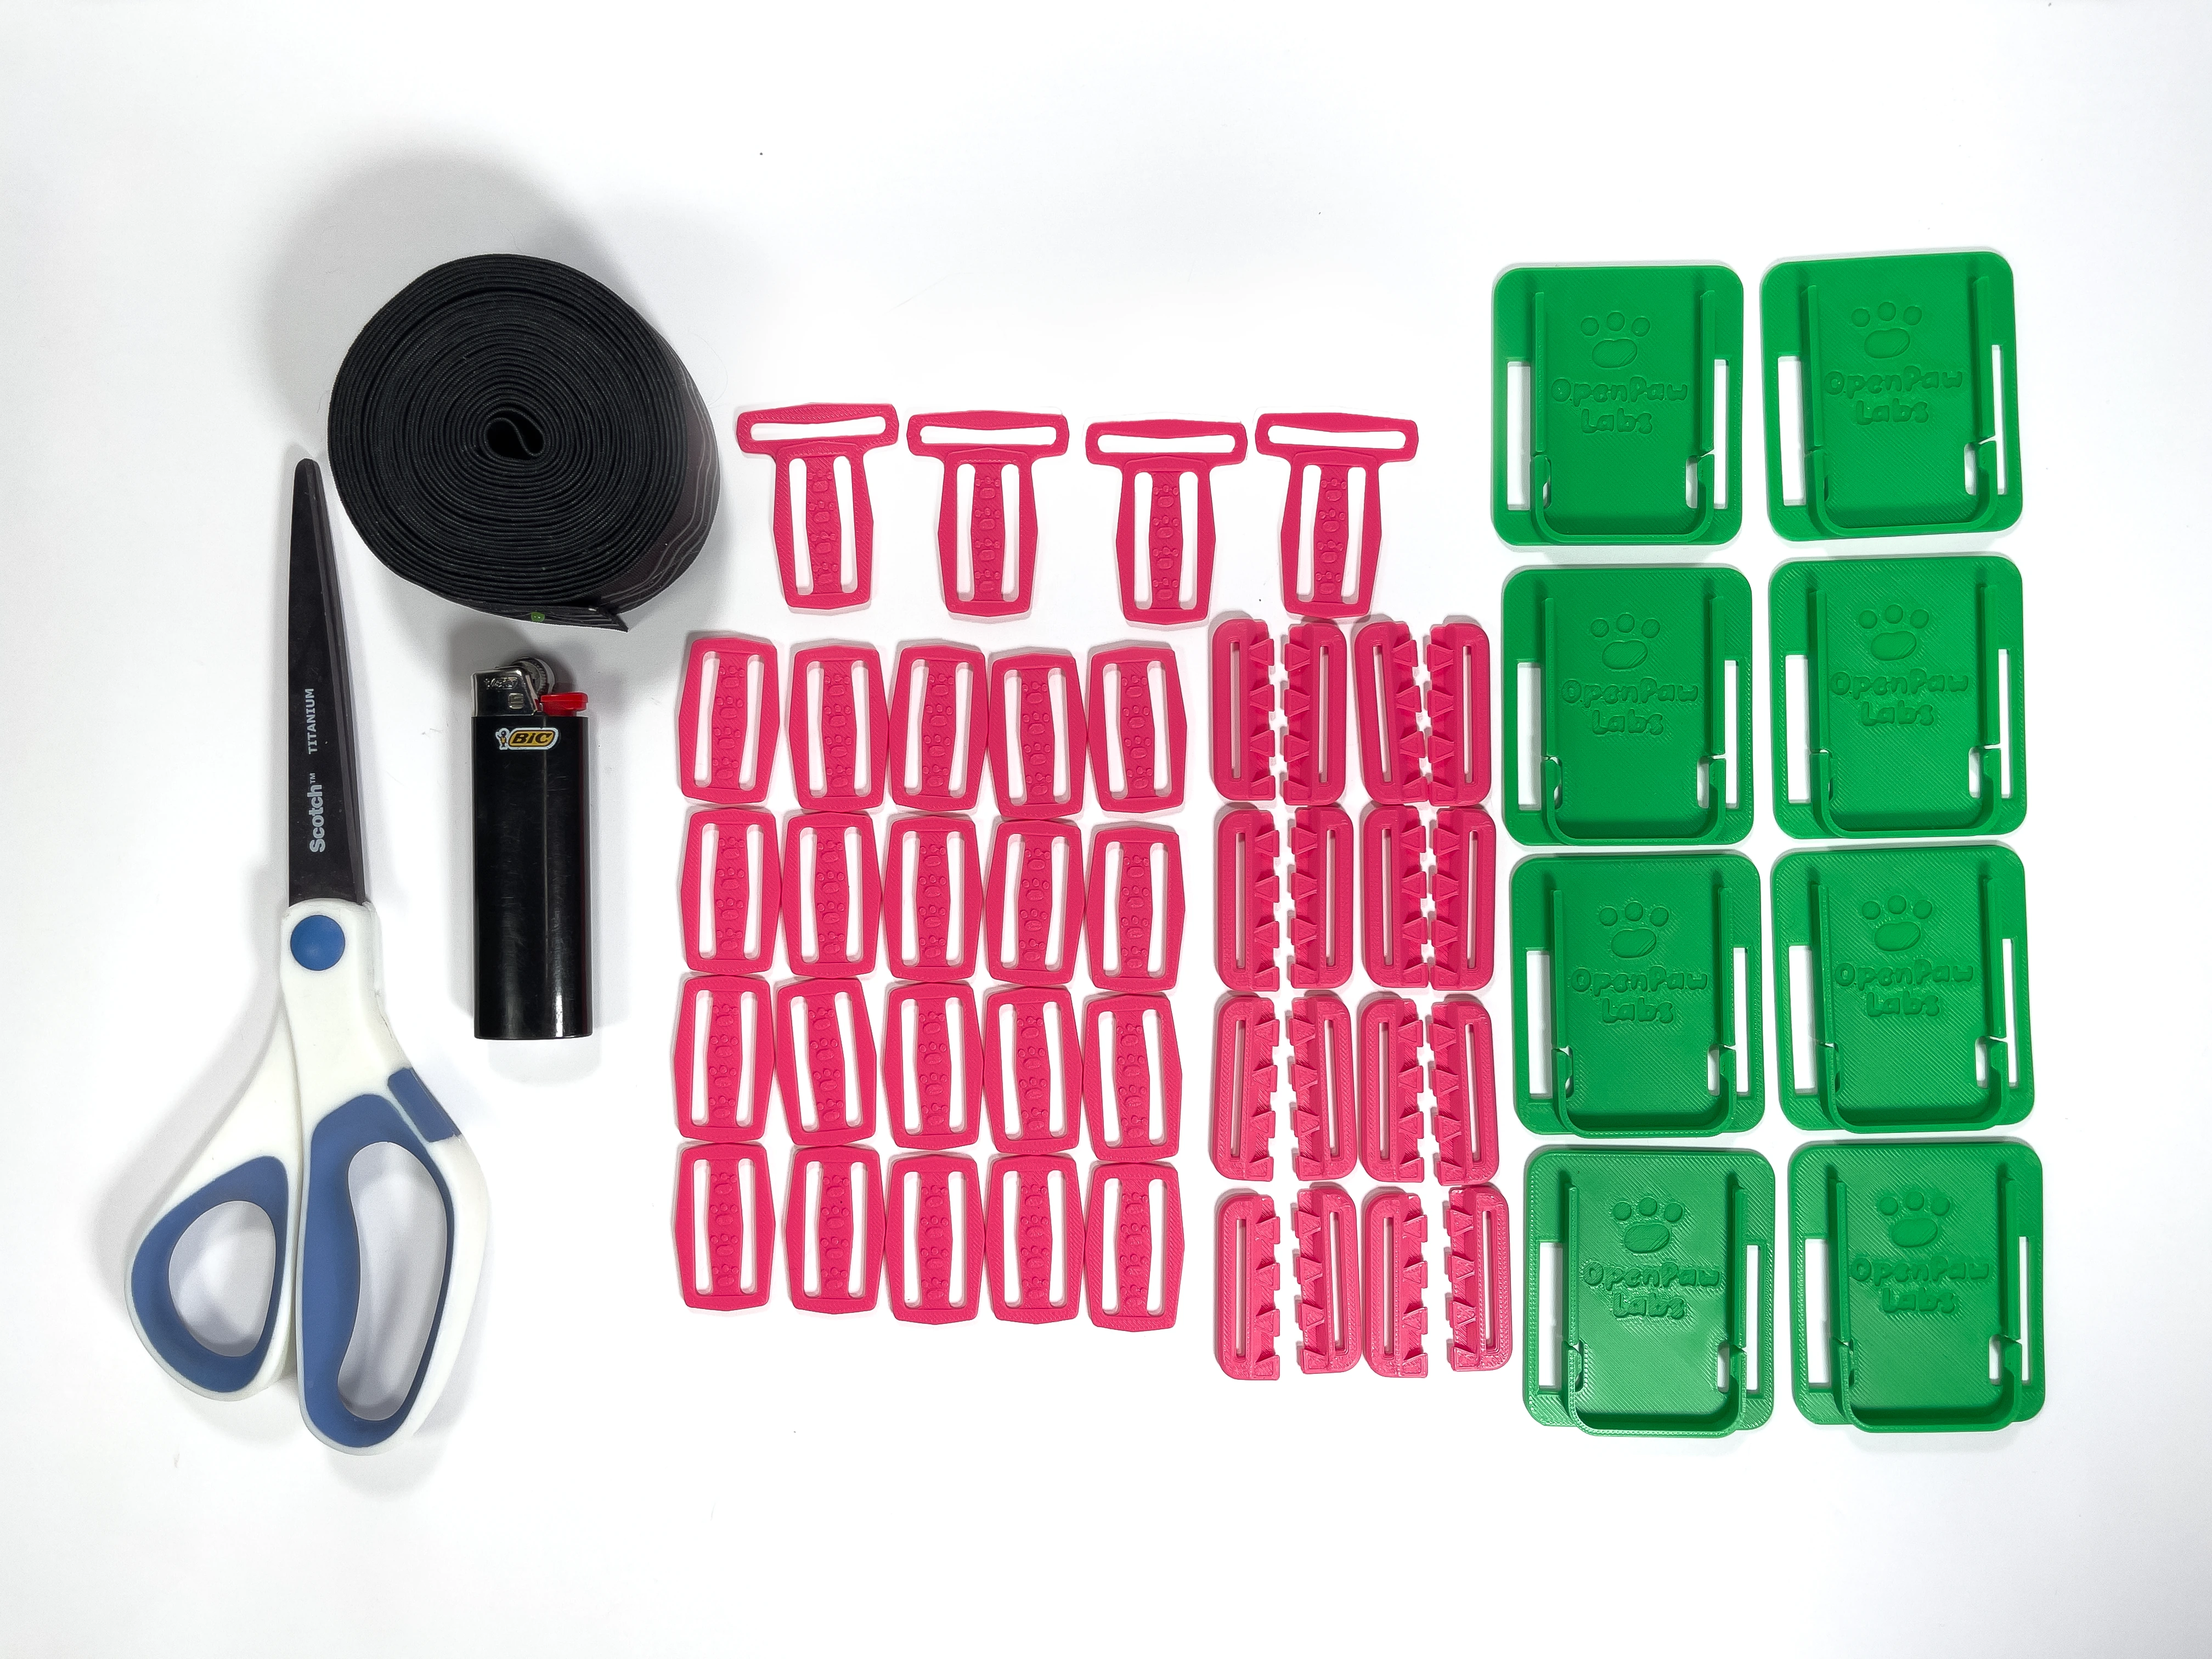
- Note:
You will need to get the following parts/tools:
Elastic Straps w/ Silicon Grips (width: 30mm / ~1.2in)
Small Lighter
Scissors
3D Printed Parts for Straps (check 3d print guide here)
- Note:
- 2
Measure & Cut Strap
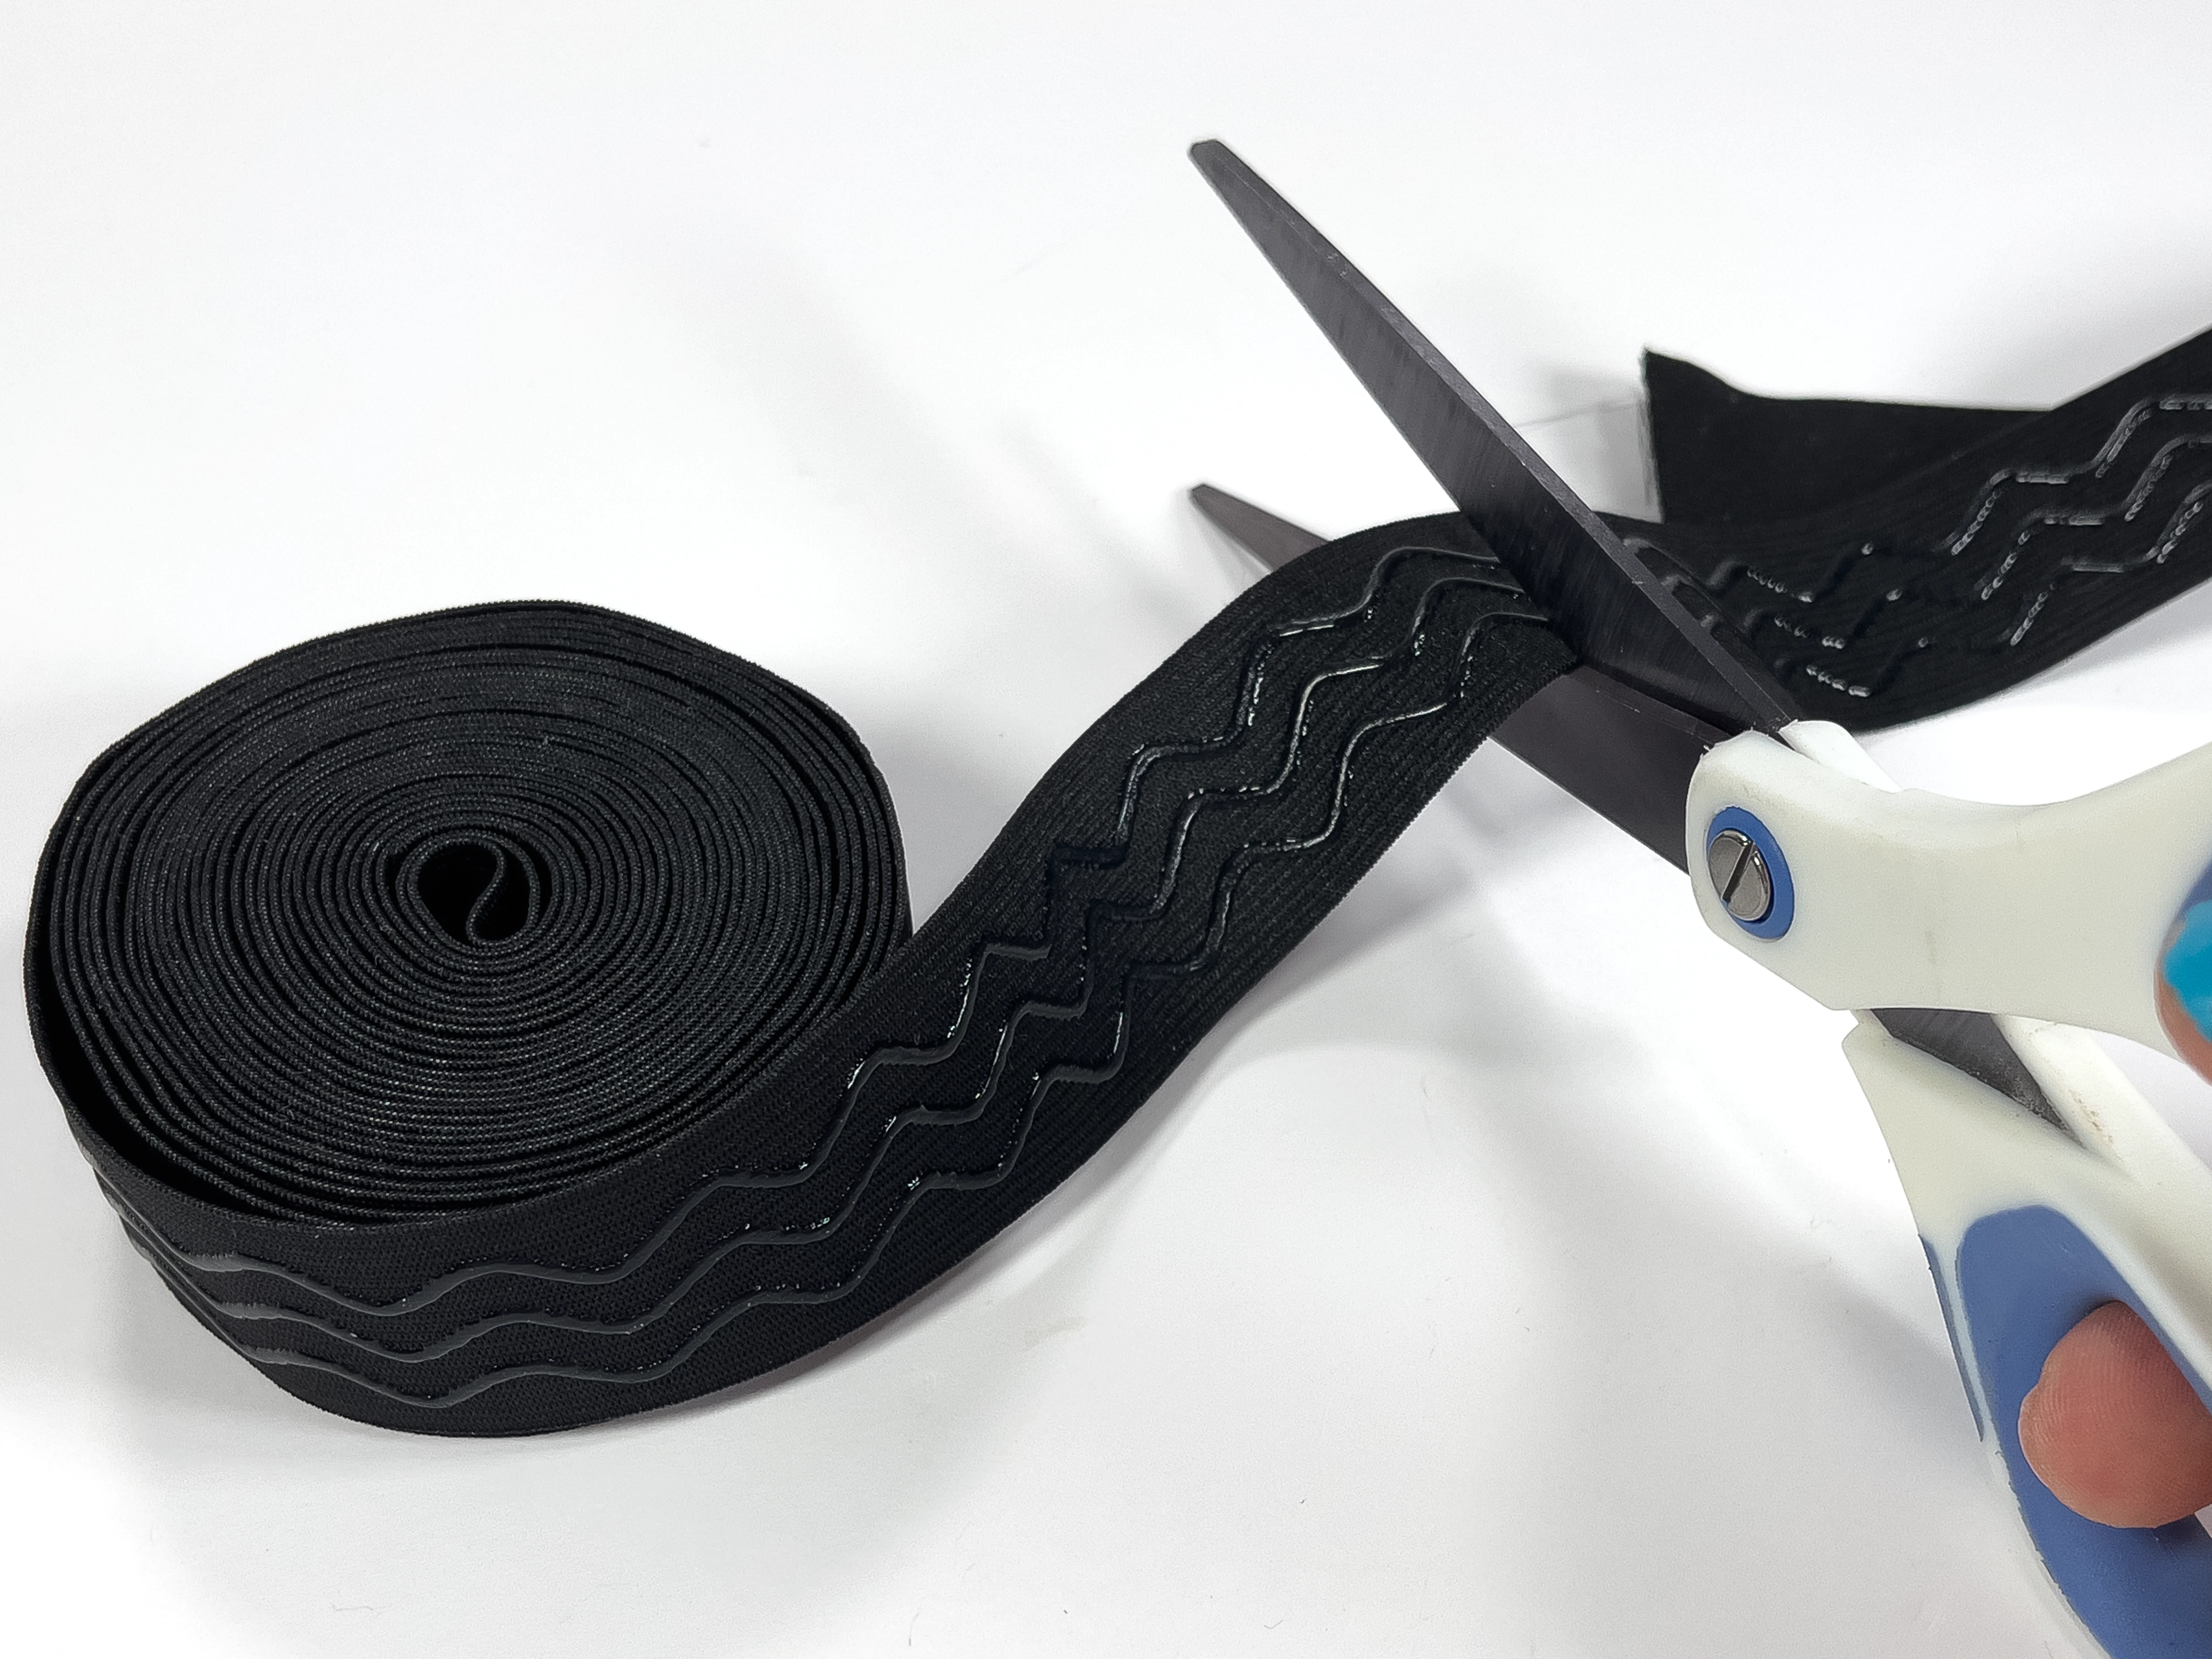
Cut the strap to the proper length by wrapping it around your body part loosely as a rough measurement, then add an additional 3-4in (75-100mm) of length.
You will need sections for your:
-
2 x Ankles (just above your ankle/foot)
-
2 x Thighs (the middle of your thigh)
-
2 x Upper Arms (where your bicep is)
-
Hip (where you wear a belt)
-
- Note:
It is better to have too much extra length vs not enough length. You can always trim them shorter later!
- 3
Melt Ends
To stop the ends fraying, take your lighter and move it over the end of the strap for ~1 second to melt/seal the end of the strap.
See video for an example of how to do this. A quick pass over the end is enough to prevent future fraying.
- Caution:
Do not leave the lighter on the end for more than a couple seconds, as it could catch fire!
- 4
Grab Strap Parts
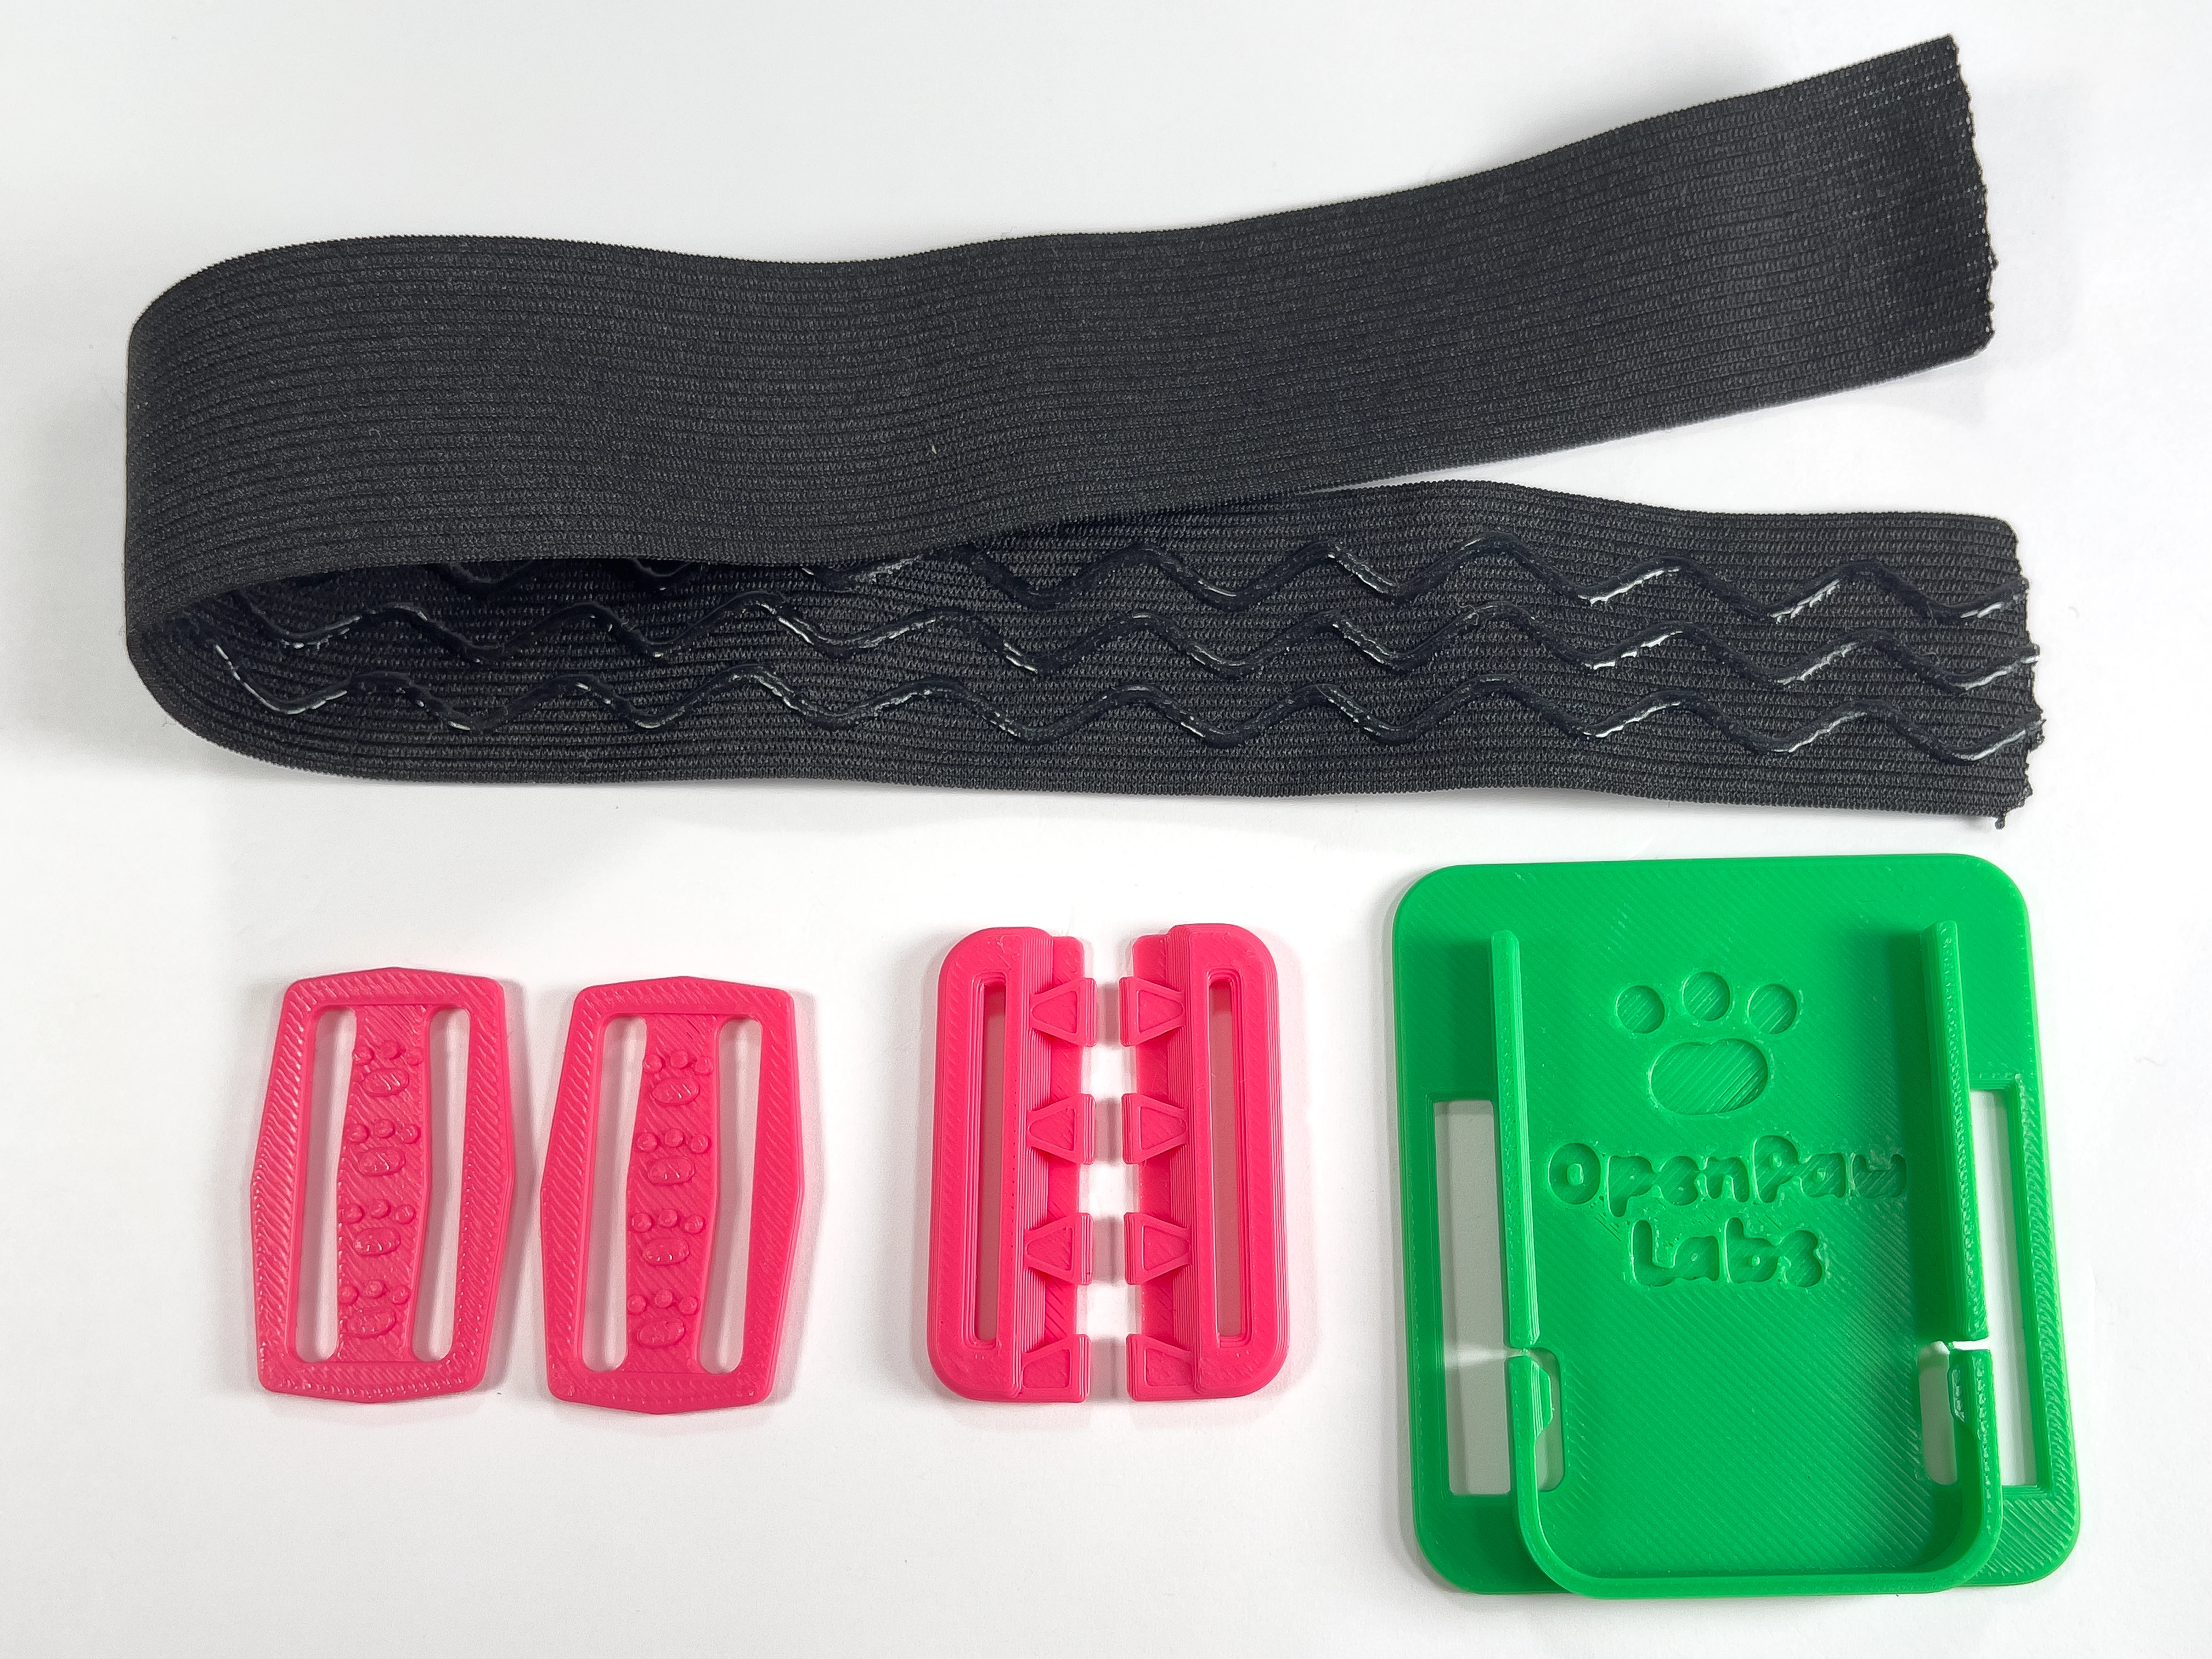
Grab a set of parts to build your strap, you will need:
-
1 x Tracker Slide Mount
-
2 x Strap Slides
-
1 pair of Clasps
-
Double check that the clasps you grab are a paired set and that they are able to connect to each other. When facing upwards each side's tabs should line up with each other.
- 5
Attach Slide
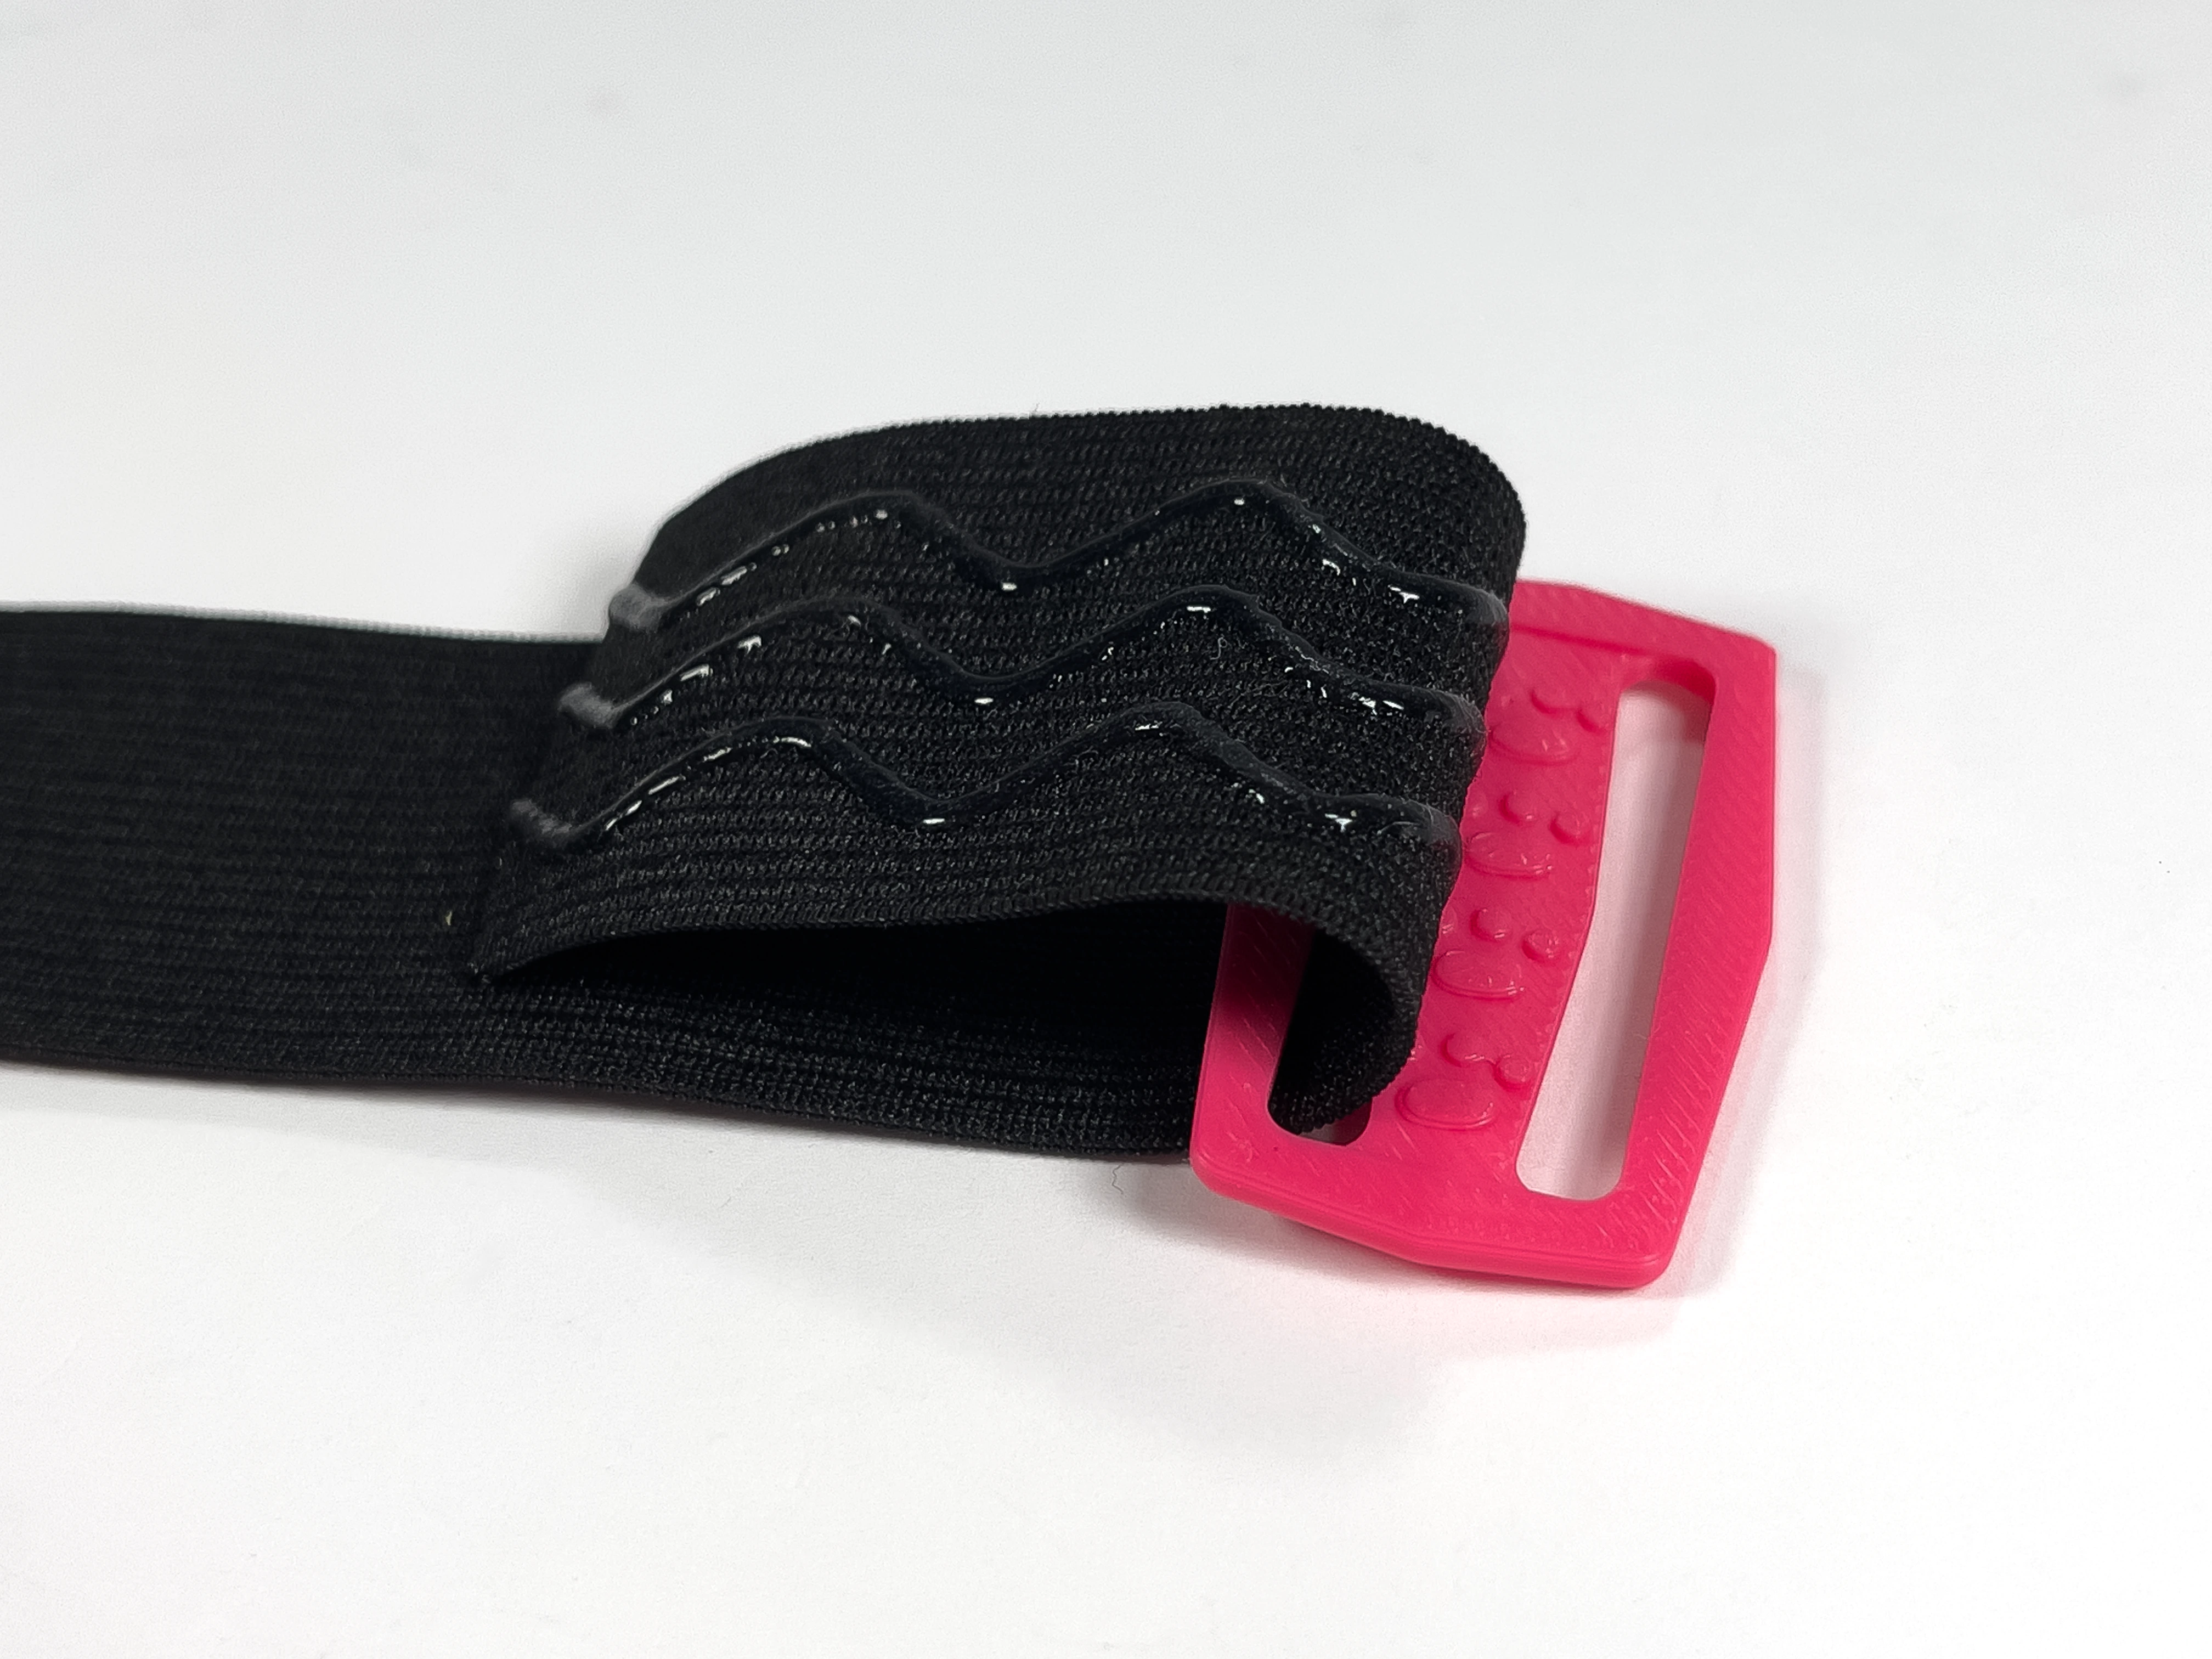
Attach the Slide to the strap by feeding the strap upwards through one end of the side, over the paw-print grips, then back down and out the other side.
Make sure that the silicon side of the strap is facing towards the paw-print grips. This helps make sure it will not move.
- 6
Attach Clasp
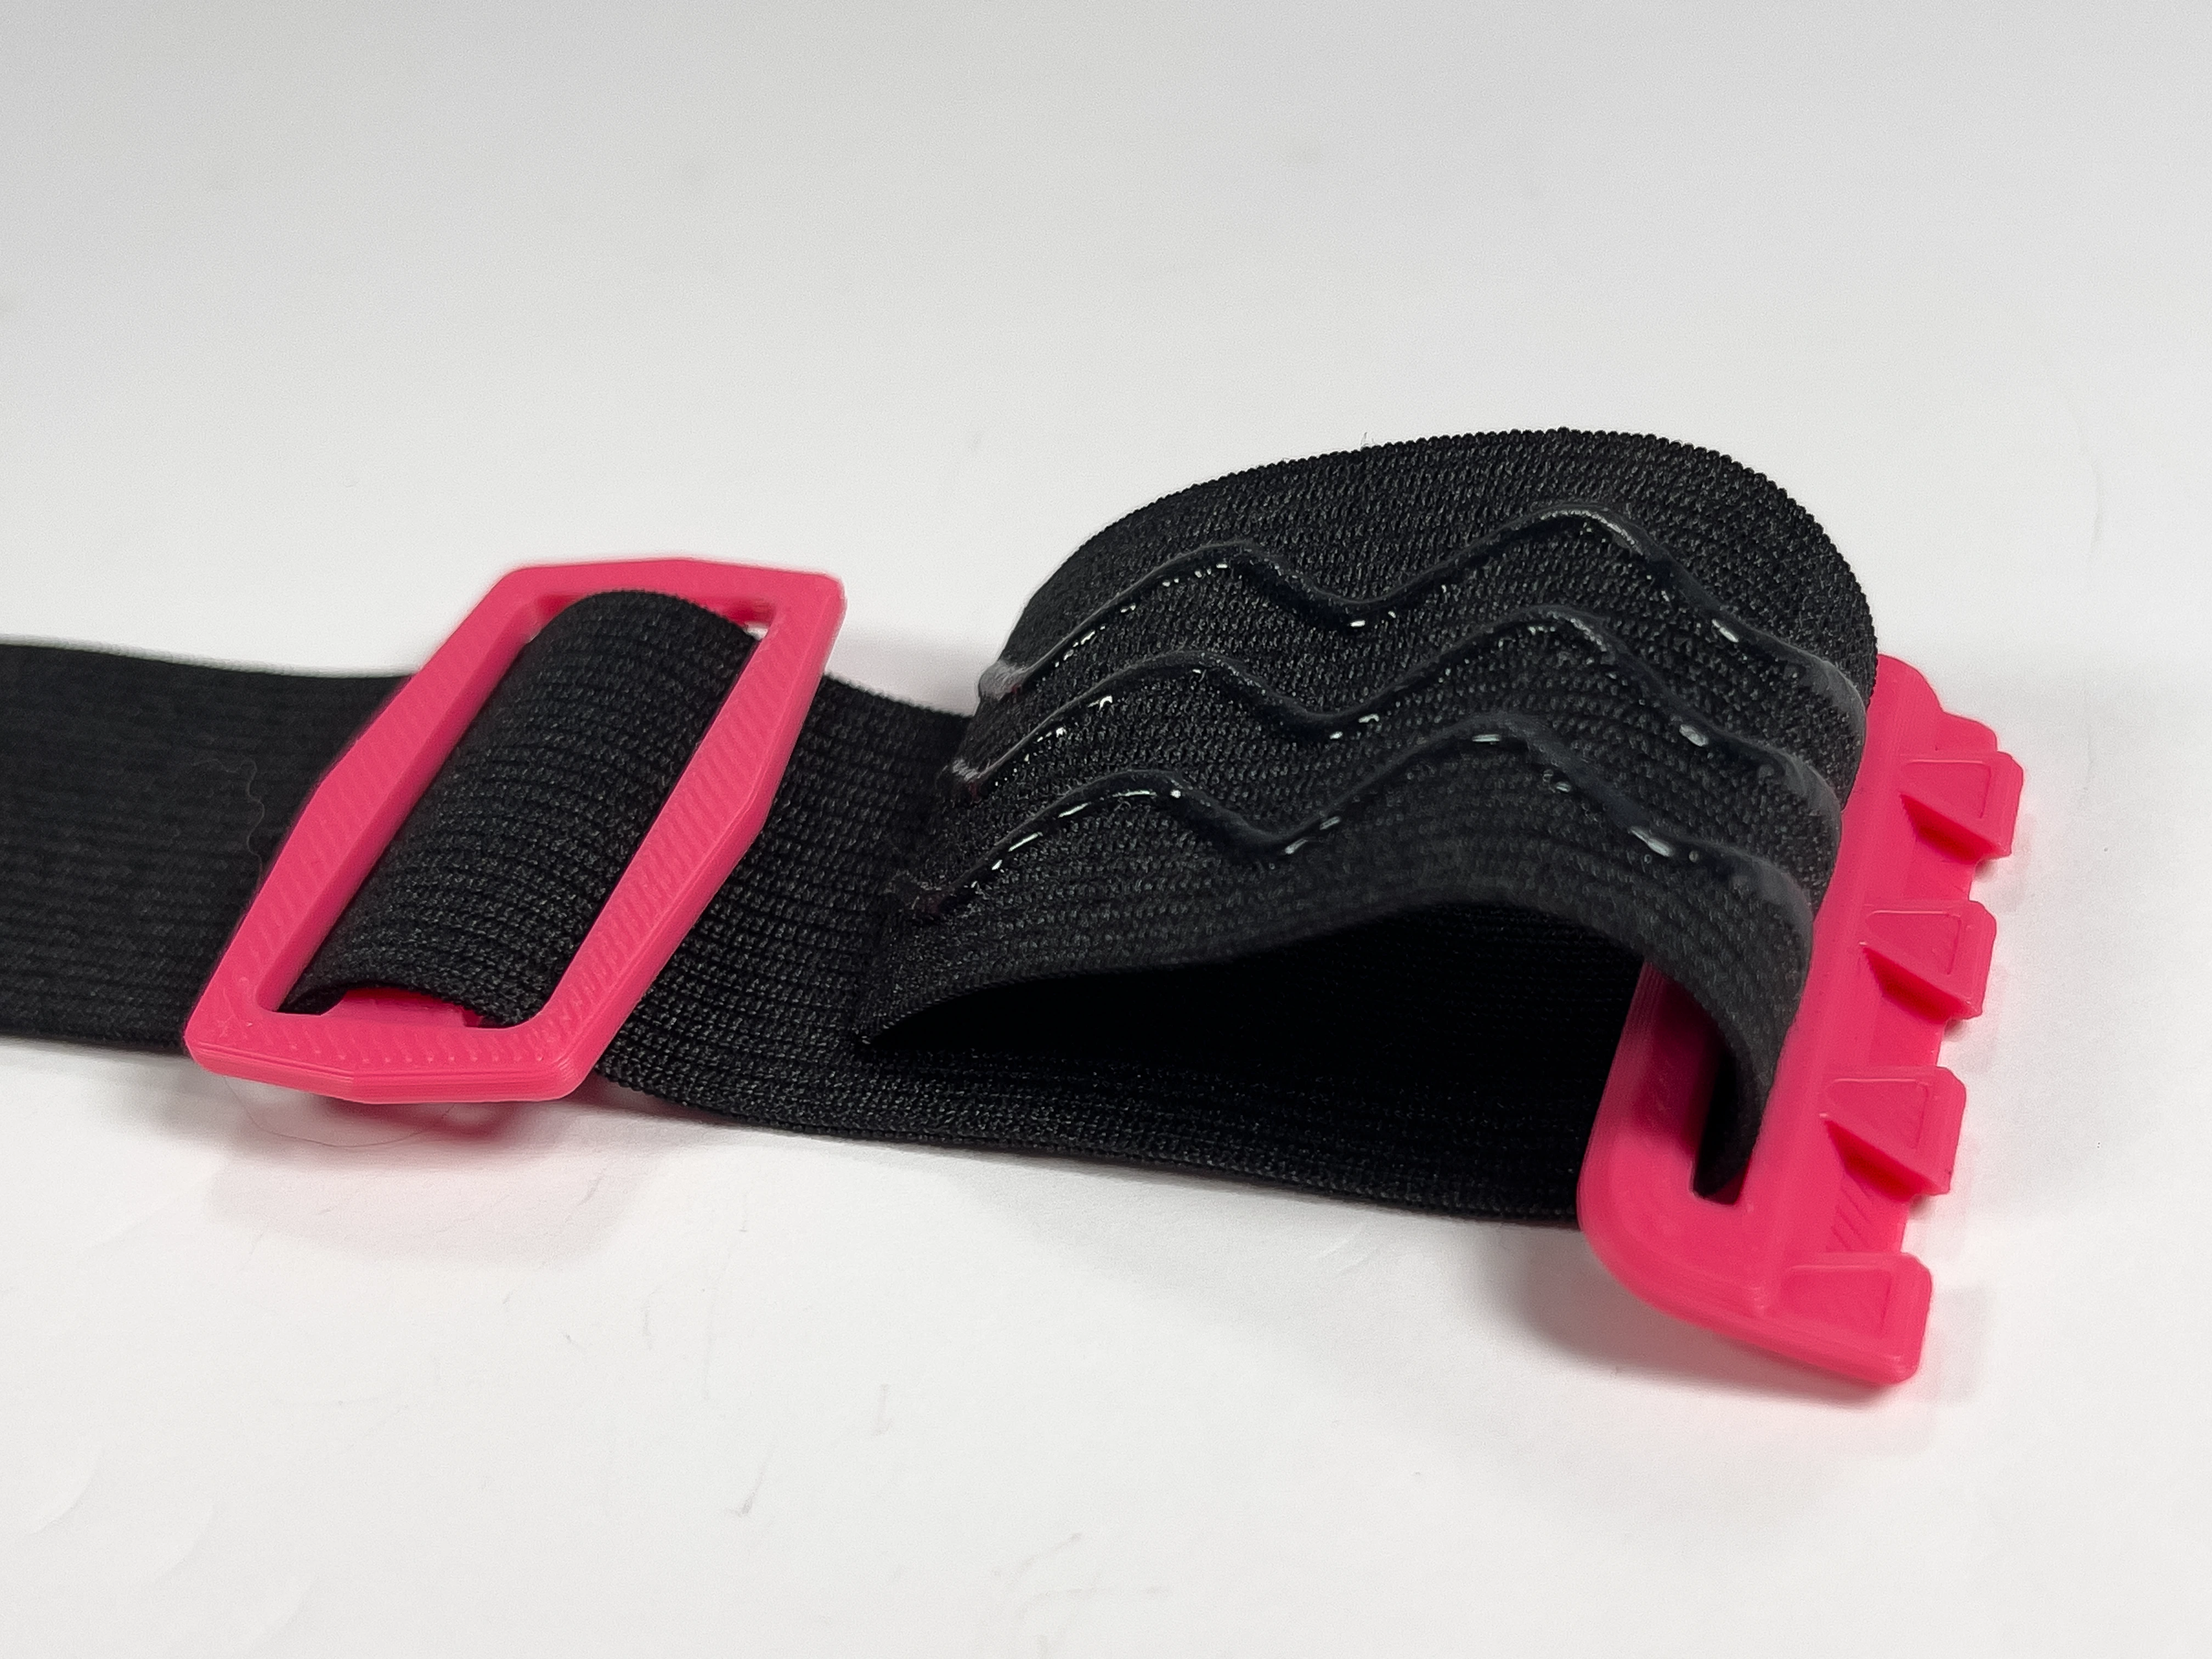
Feed the strap upwards through the side of the Clasp, then feed it back through the Slide, making sure that the silicon is now facing upwards.
- 7
Attach Tracker Slide Mount
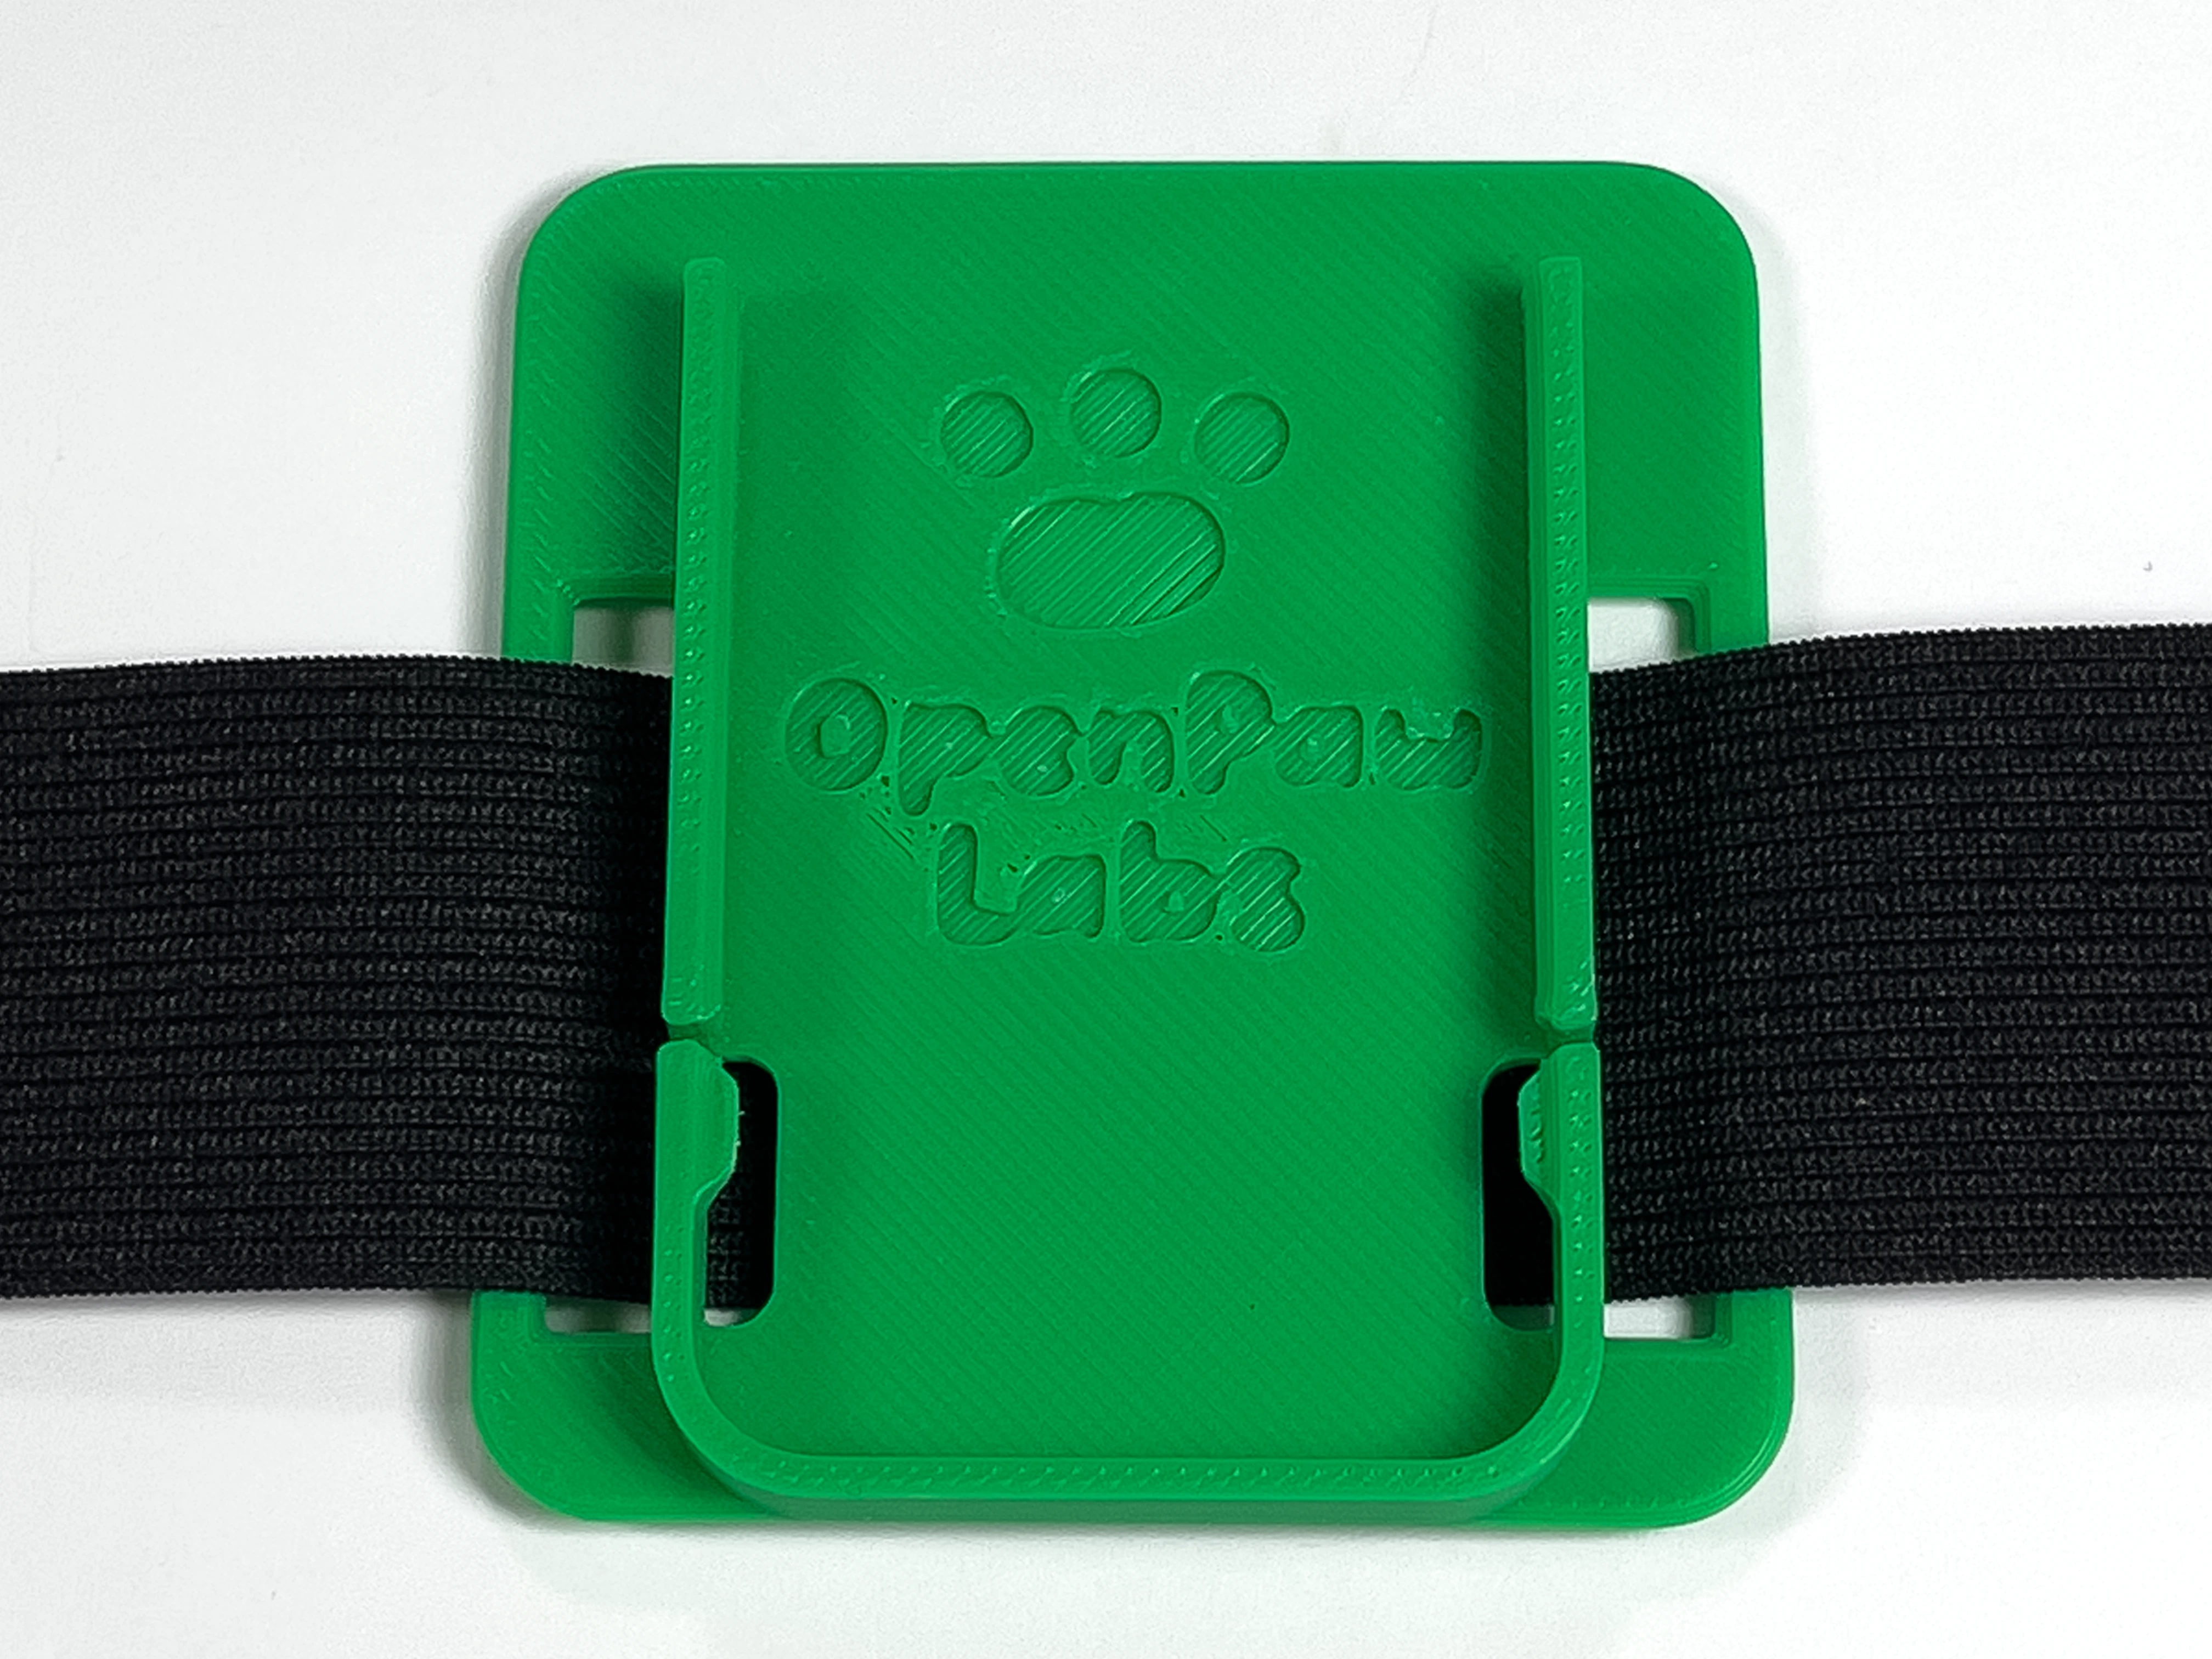
Take your Tracker Slide Mount and thread it onto the strap, feeding the strap behind the slide mount.
- 8
Attach Second Clasp
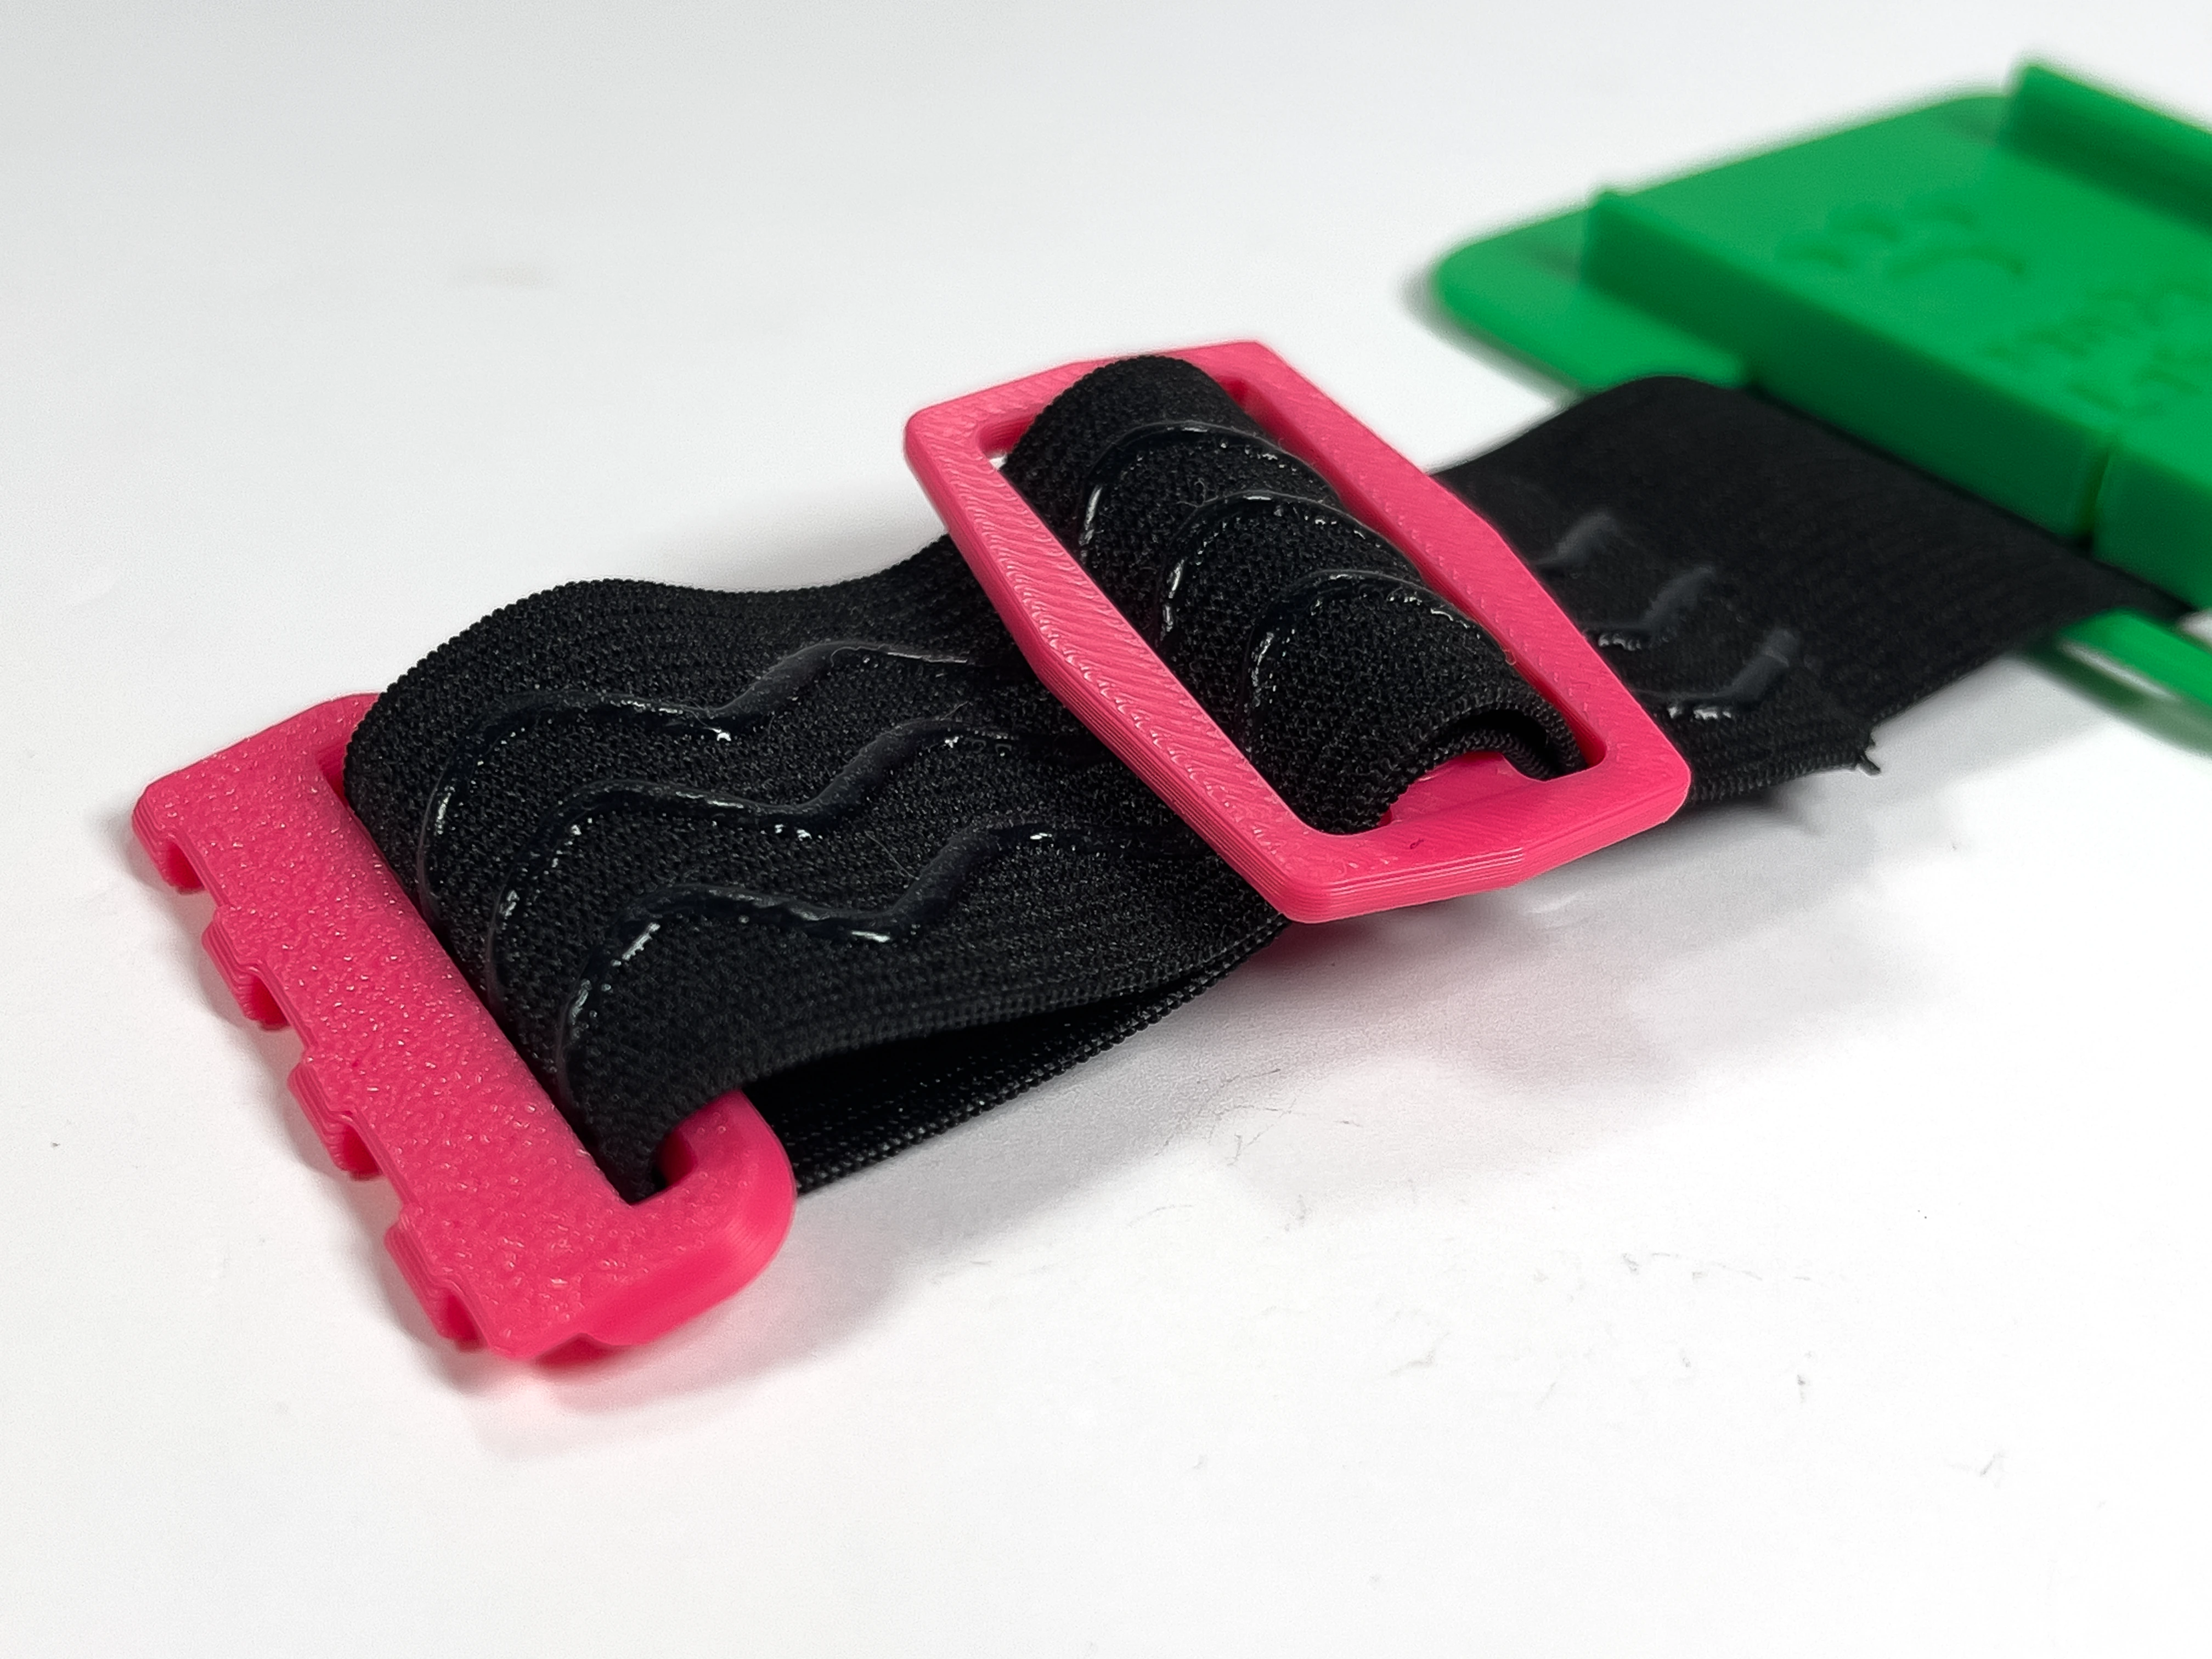
Repeat steps 5 & 6 to thread on a second Slide, making sure that the other end of the clasp is facing downwards.
Verify that you can connect the two ends of the clasps together.
- 9
Tighten Straps
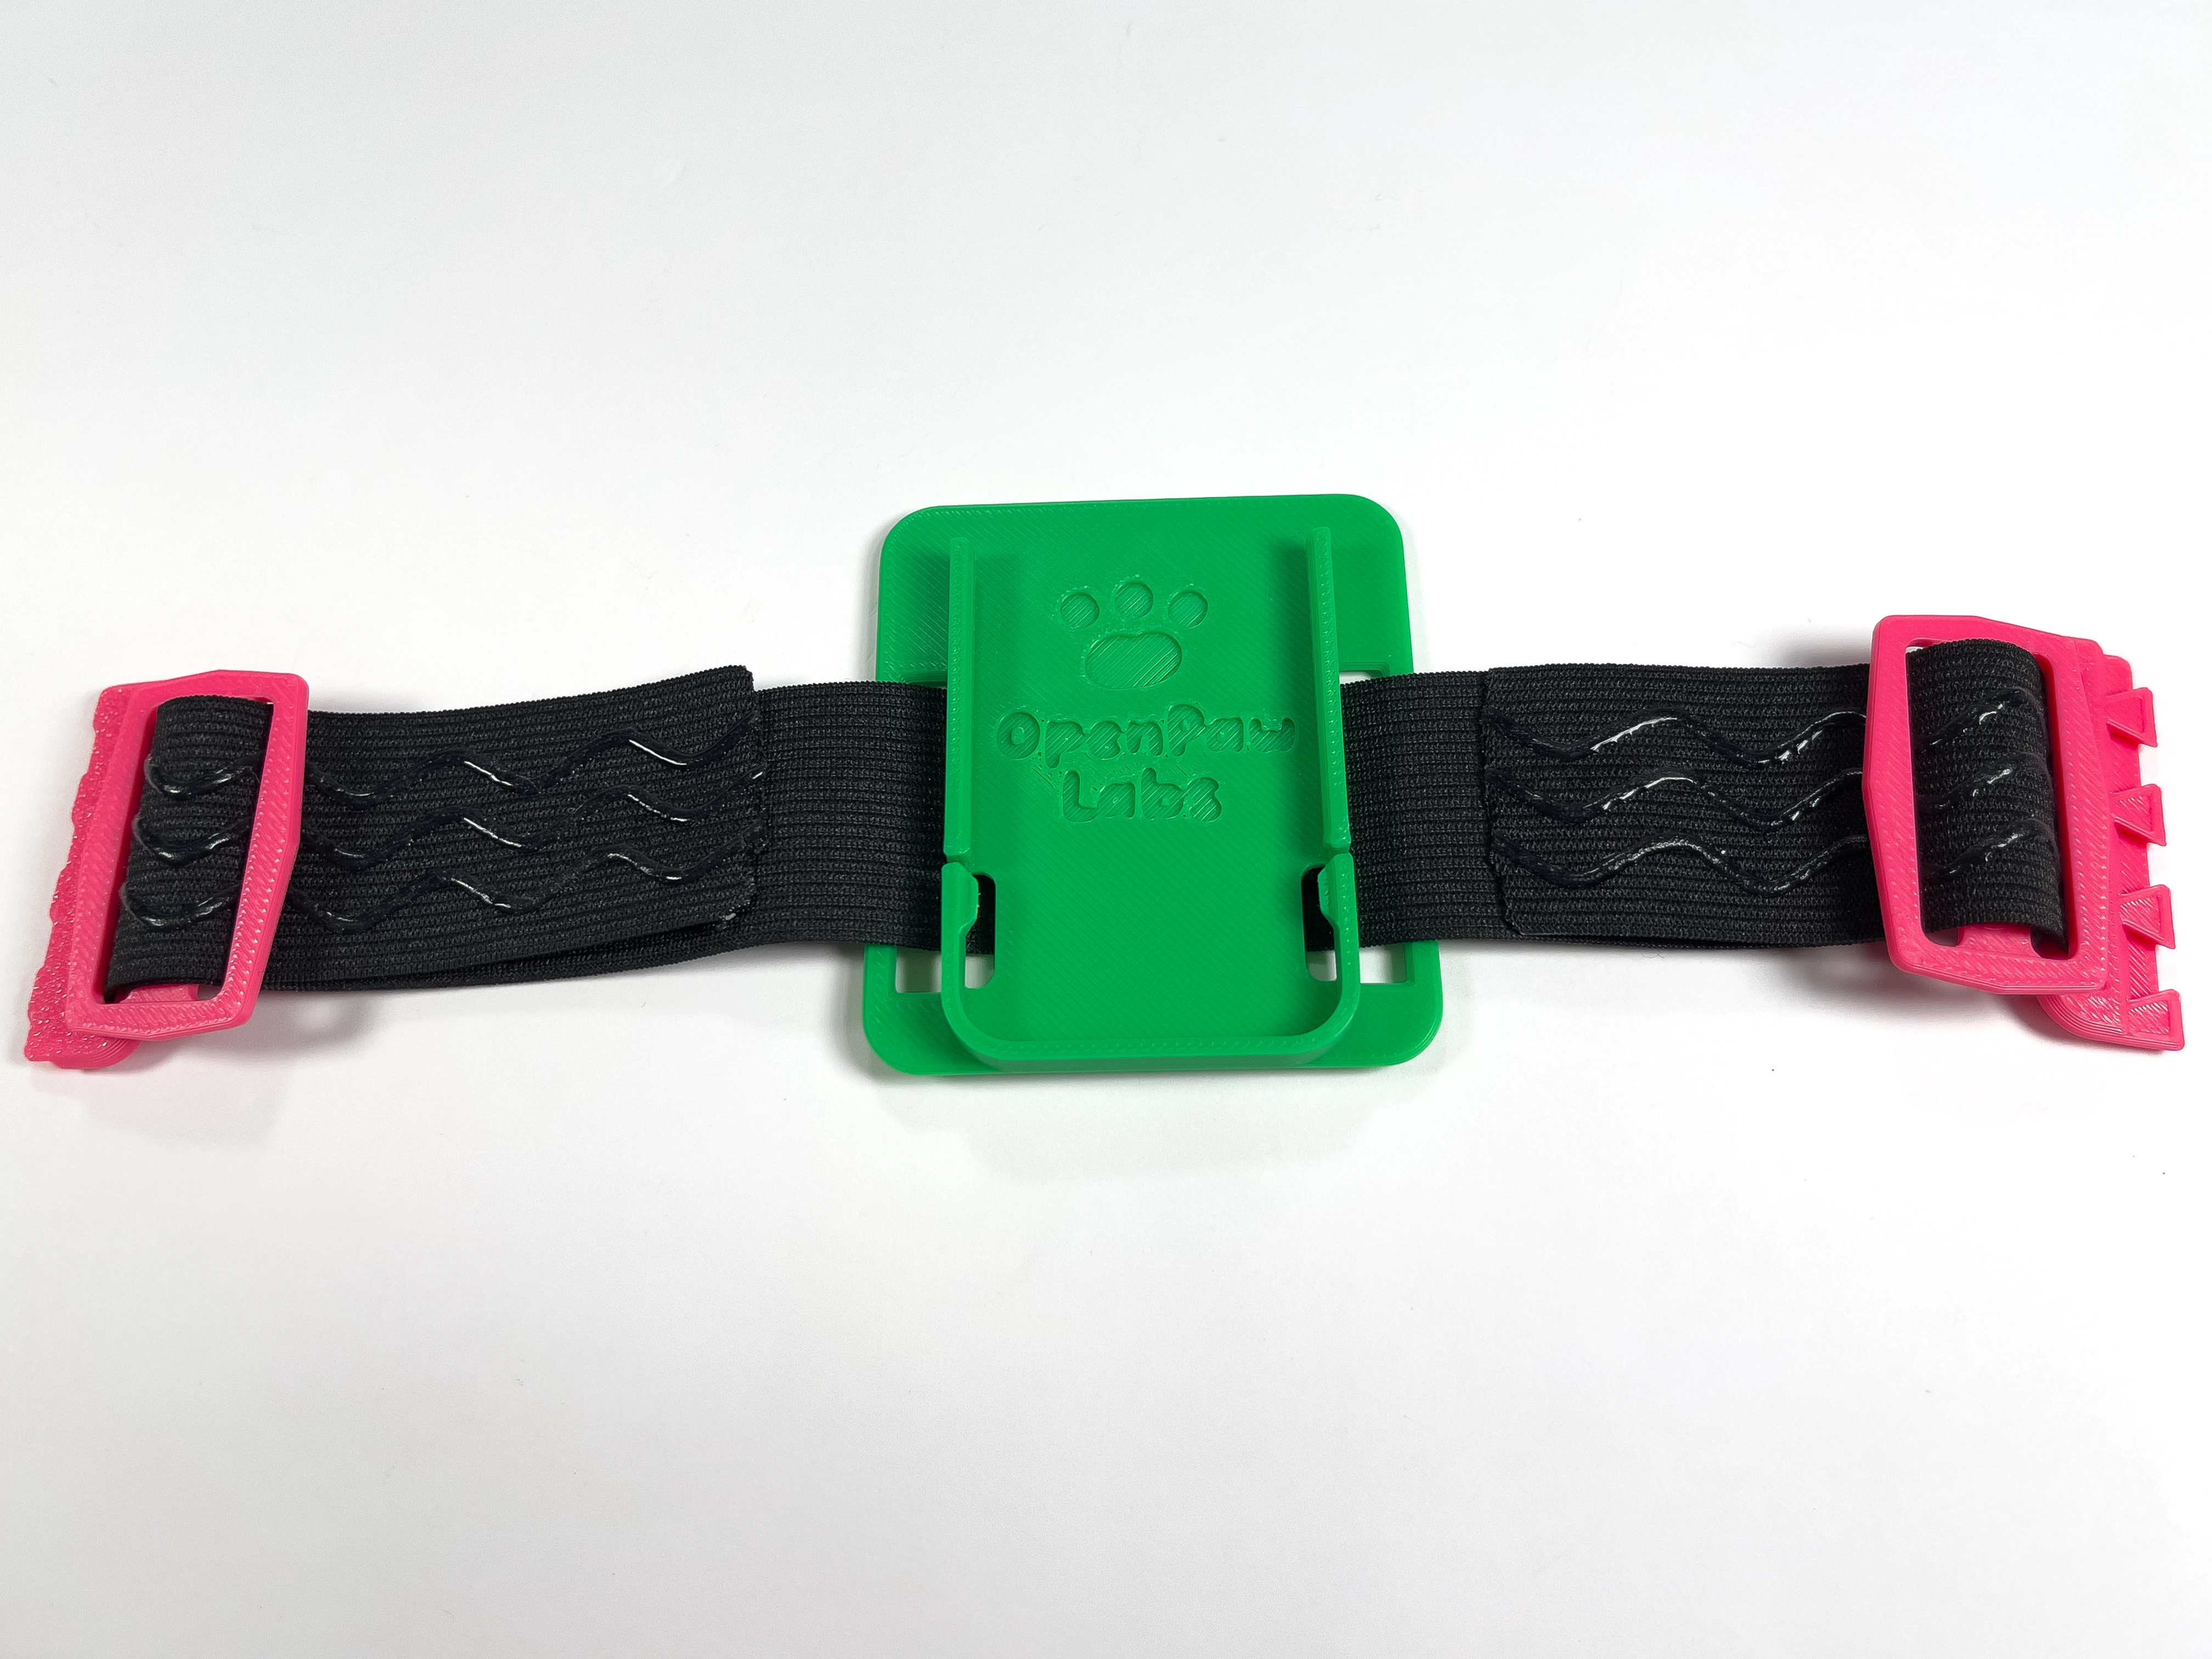
Put on your strap and tighten down the straps moving the Slides to be adjacent to the Clasp halves.
To tighten the strap, move the slide away from the clasp, then hold the loose end of the strap and pull while moving the slide towards the clasp.
To loosen the strap, move the slide away from the clasp, then move it back towards the clasp without holding the loose end of the strap.
- Note:
If the ends of the straps are getting in the way, you can trim them back, making sure to leave 1-2 inches behind the Slides. Just make sure to repeat step 3 and melt the ends again to prevent fraying.
- 10
Repeat for other Straps
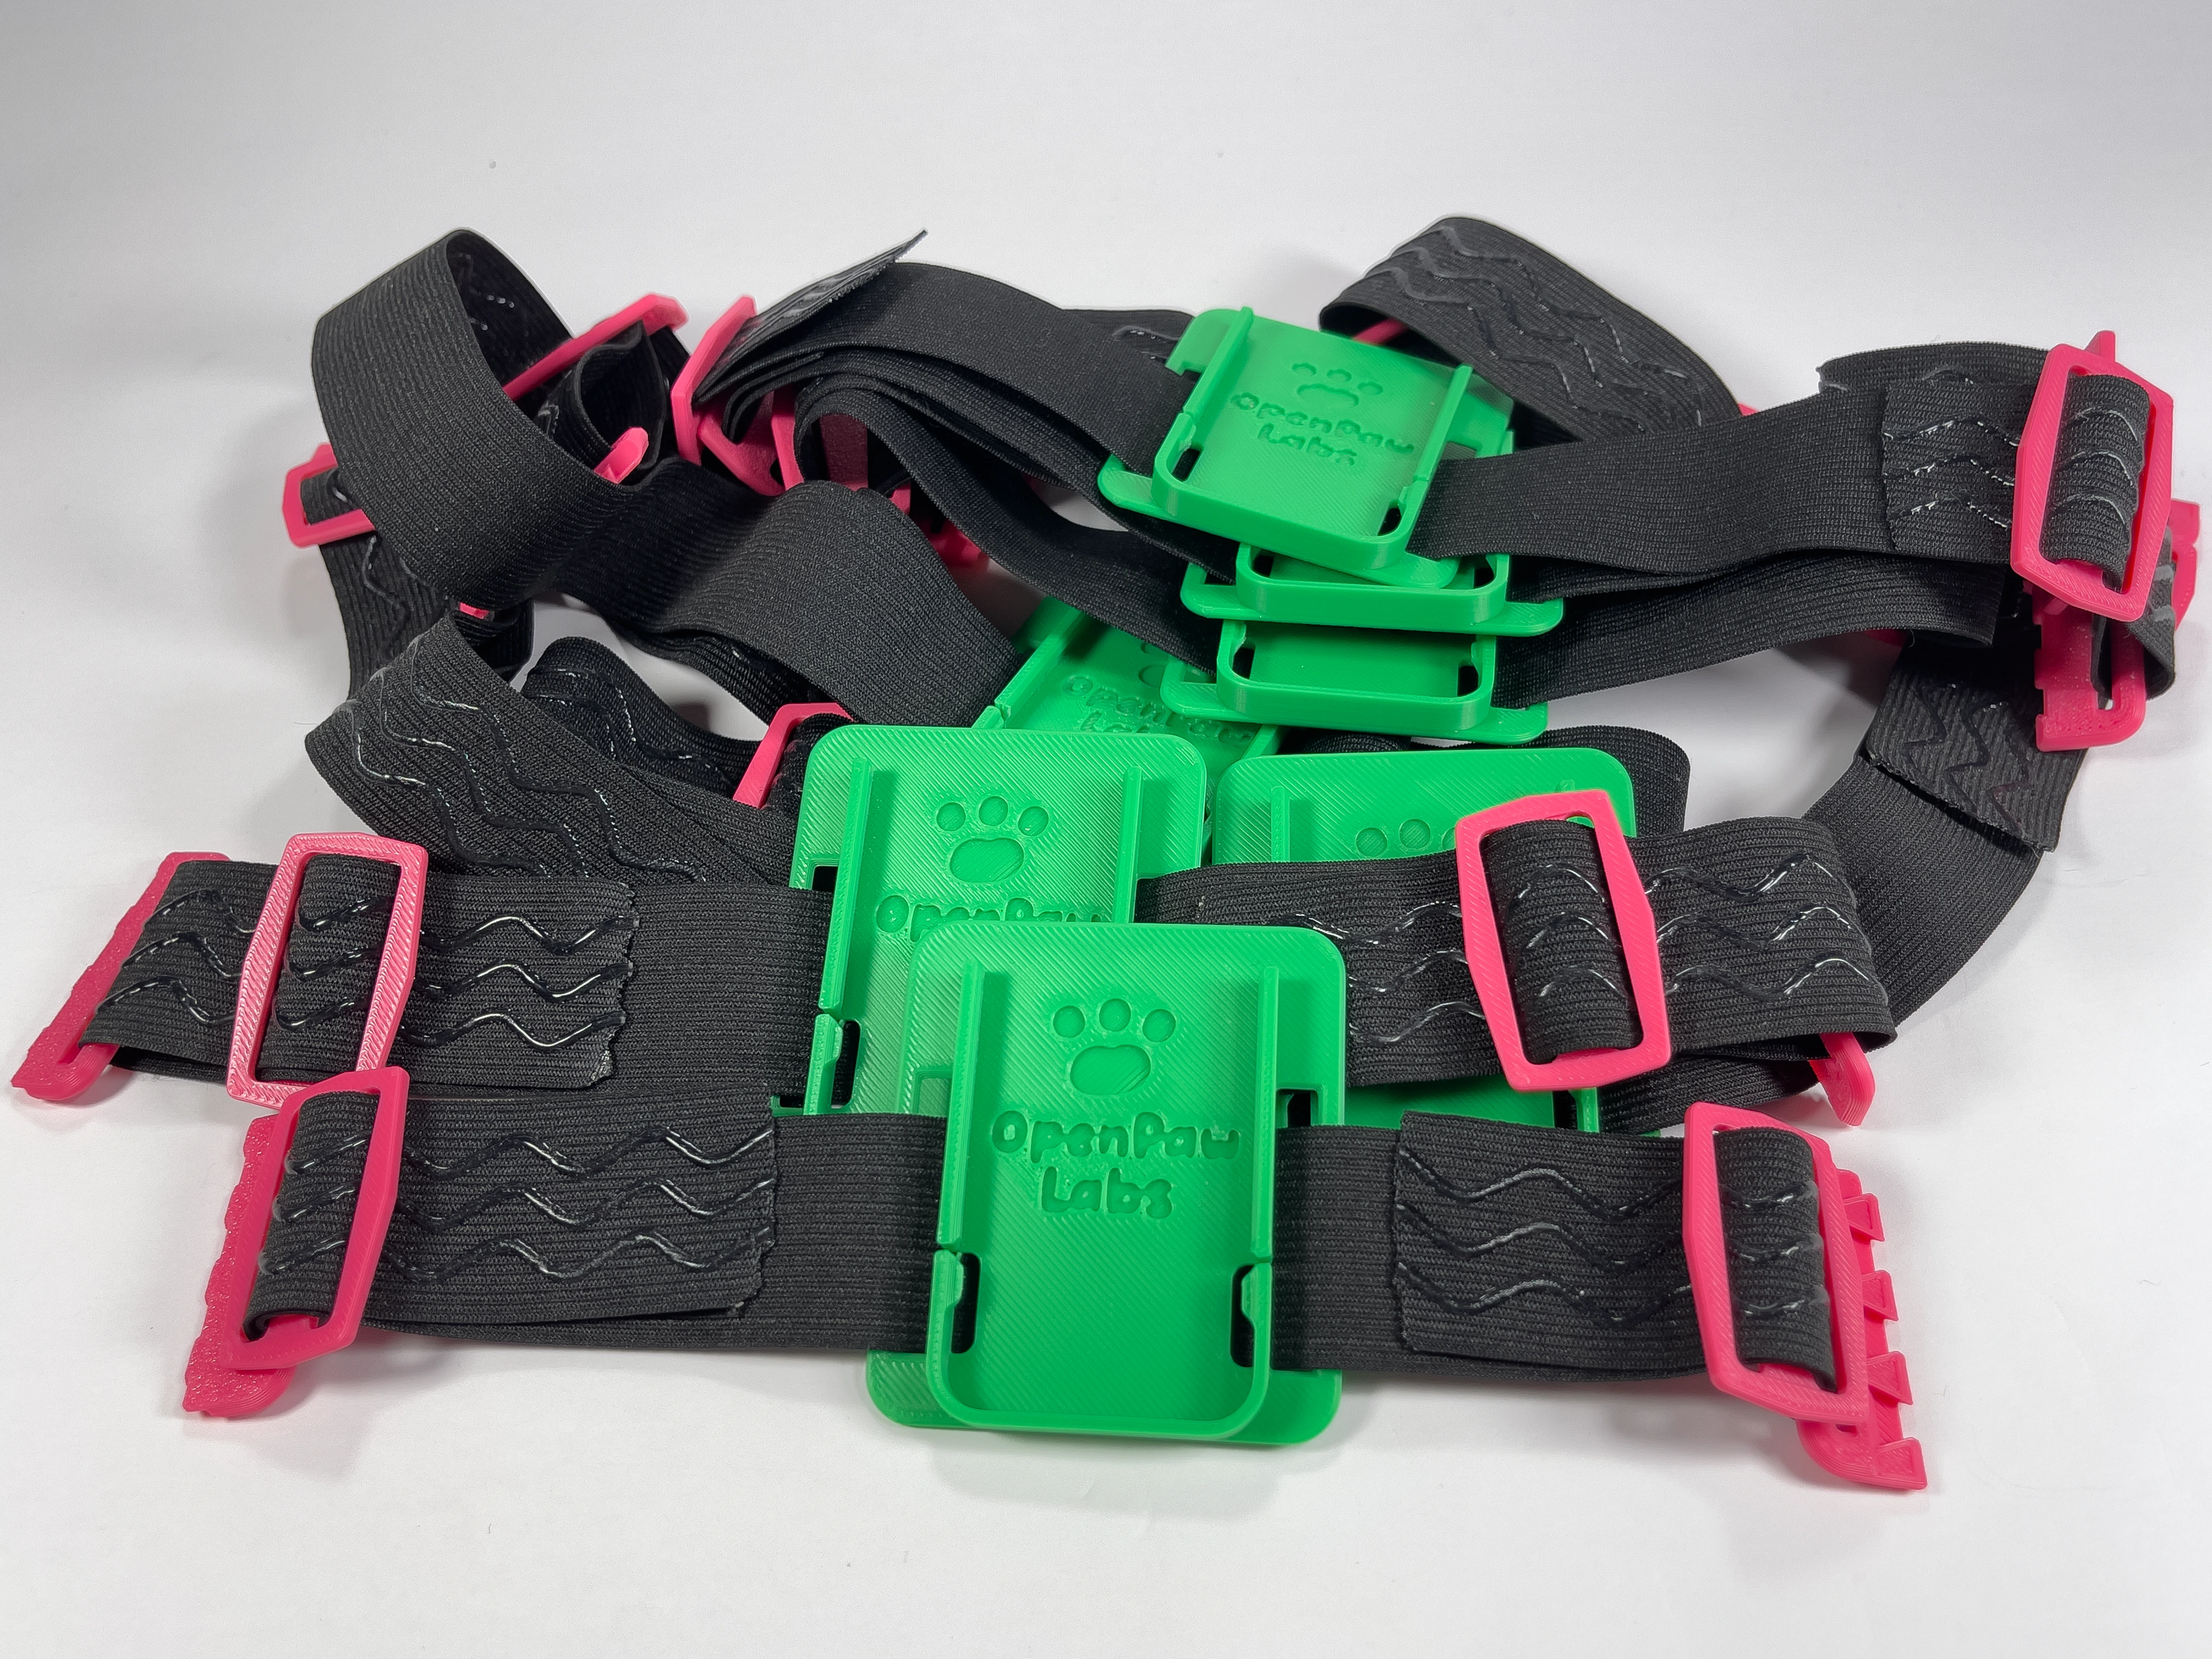
Repeat steps 2-9 until you have completed all of the straps except for your chest harness. Make sure to make the following straps:
-
2 x Ankles
-
2 x Thighs
-
2 x Upper Arms
-
Hip (Belt line)
-
- 11
Measure Chest Straps
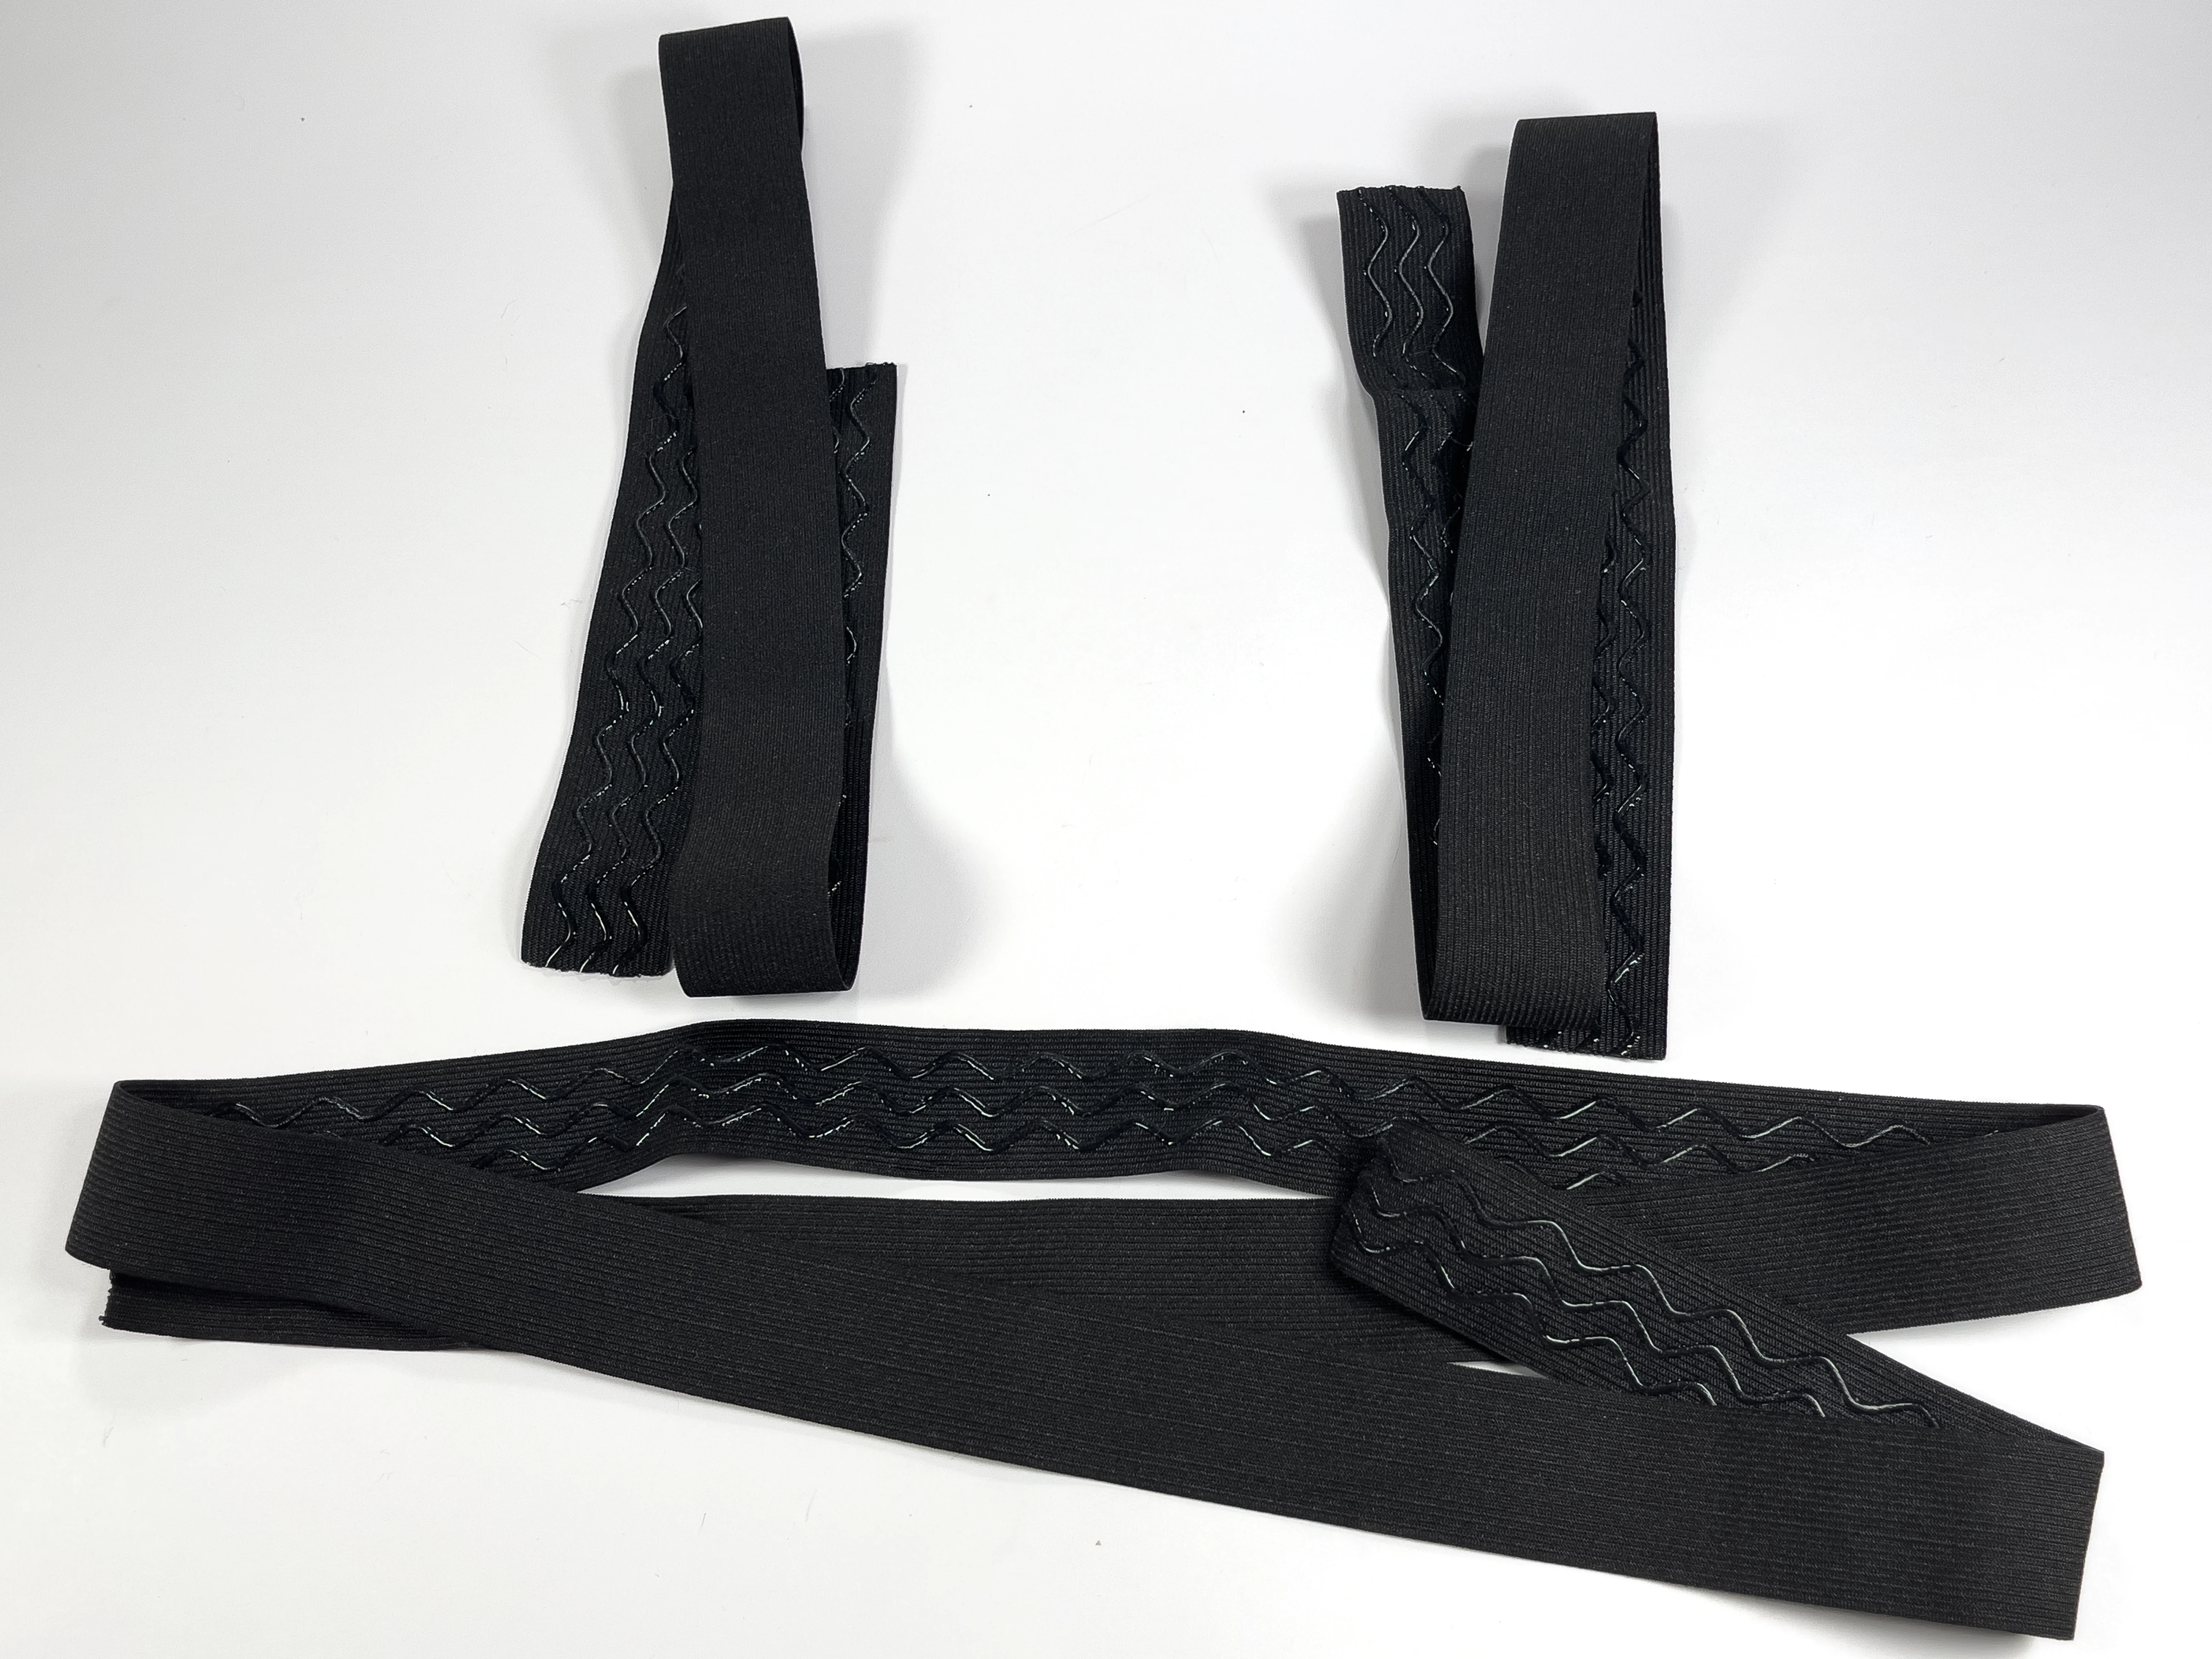
Measure a chest strap just under your armpits, across the top of your chest and across your back.
Estimate/measure shoulder straps by placing the strap material over your shoulder, going from the top of your shoulder blade to the top of your chest (where you measured the strap going around your chest)
Add a 3-4" (75-100mm) extra to these measurements, you can always come back and trim off extra material later if it is too long after testing the fit!
- 12
Chest Harness Parts
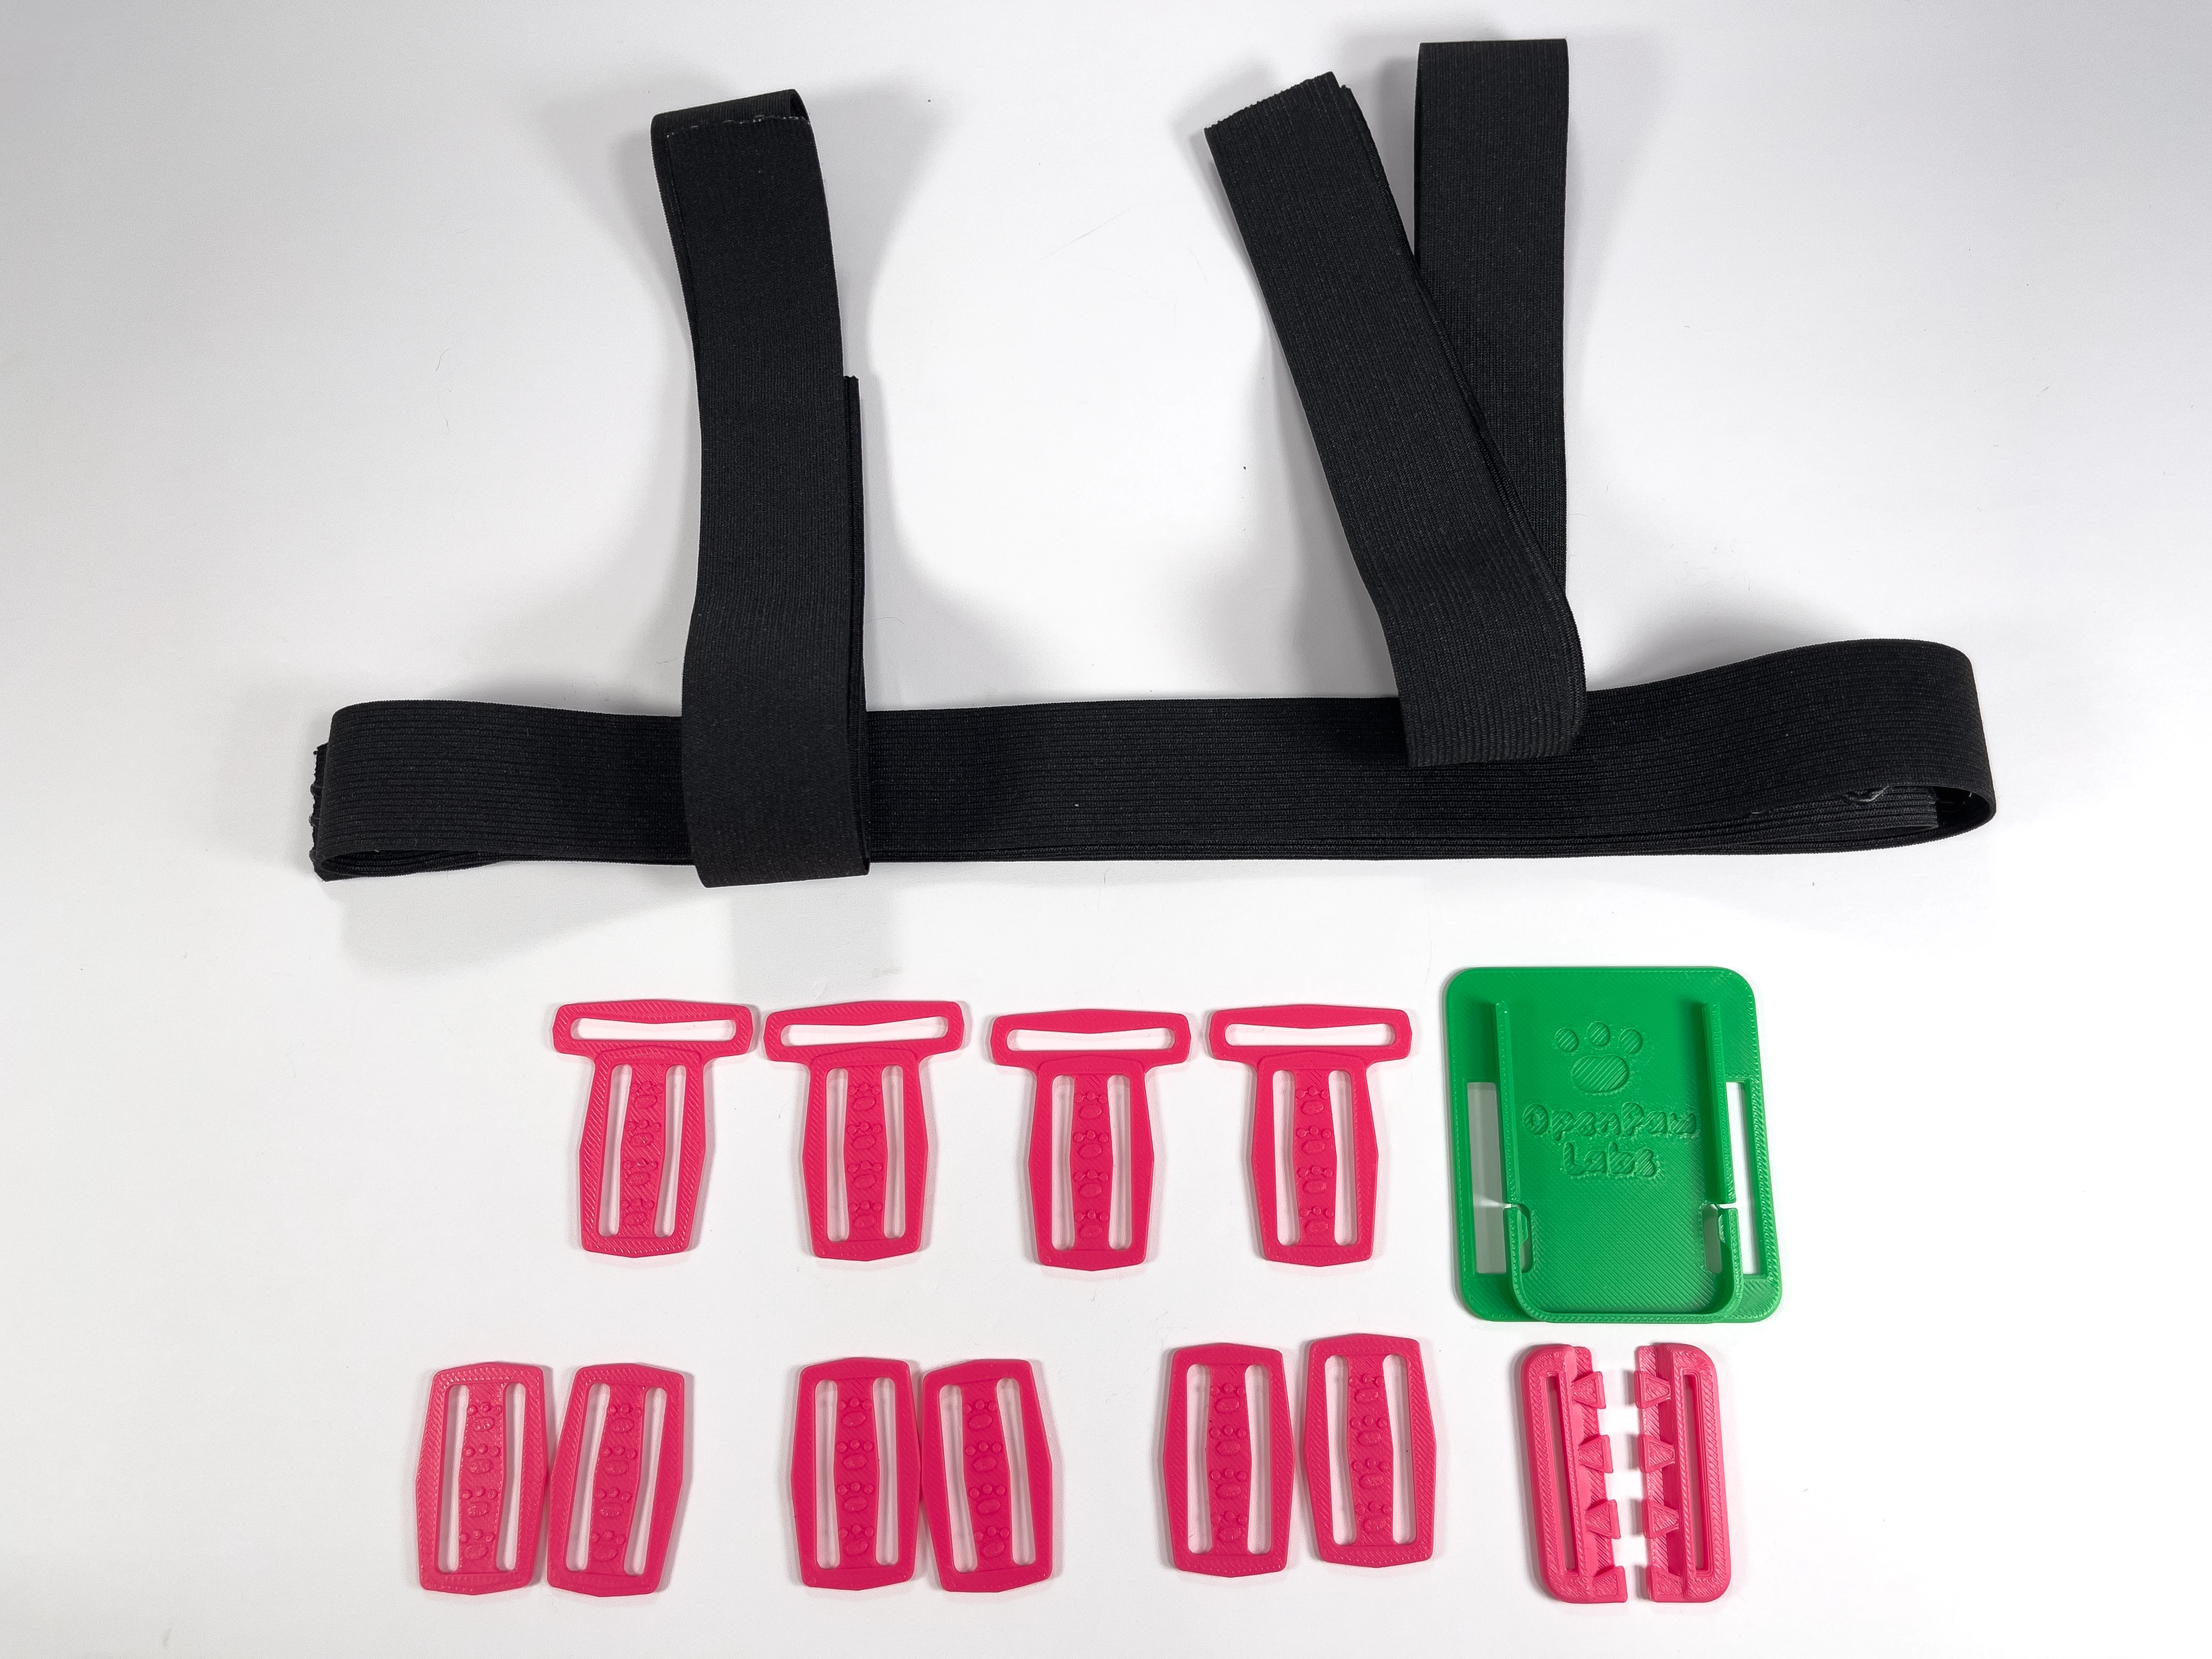
Grab the remaining parts to assemble your chest harness. You will need:
-
1 x Tracker Slide Mount
-
4 x 3-way Slides
-
6 x normal Slides
-
1 pair of Clasps
-
- 13
Attach 3-Way Slides
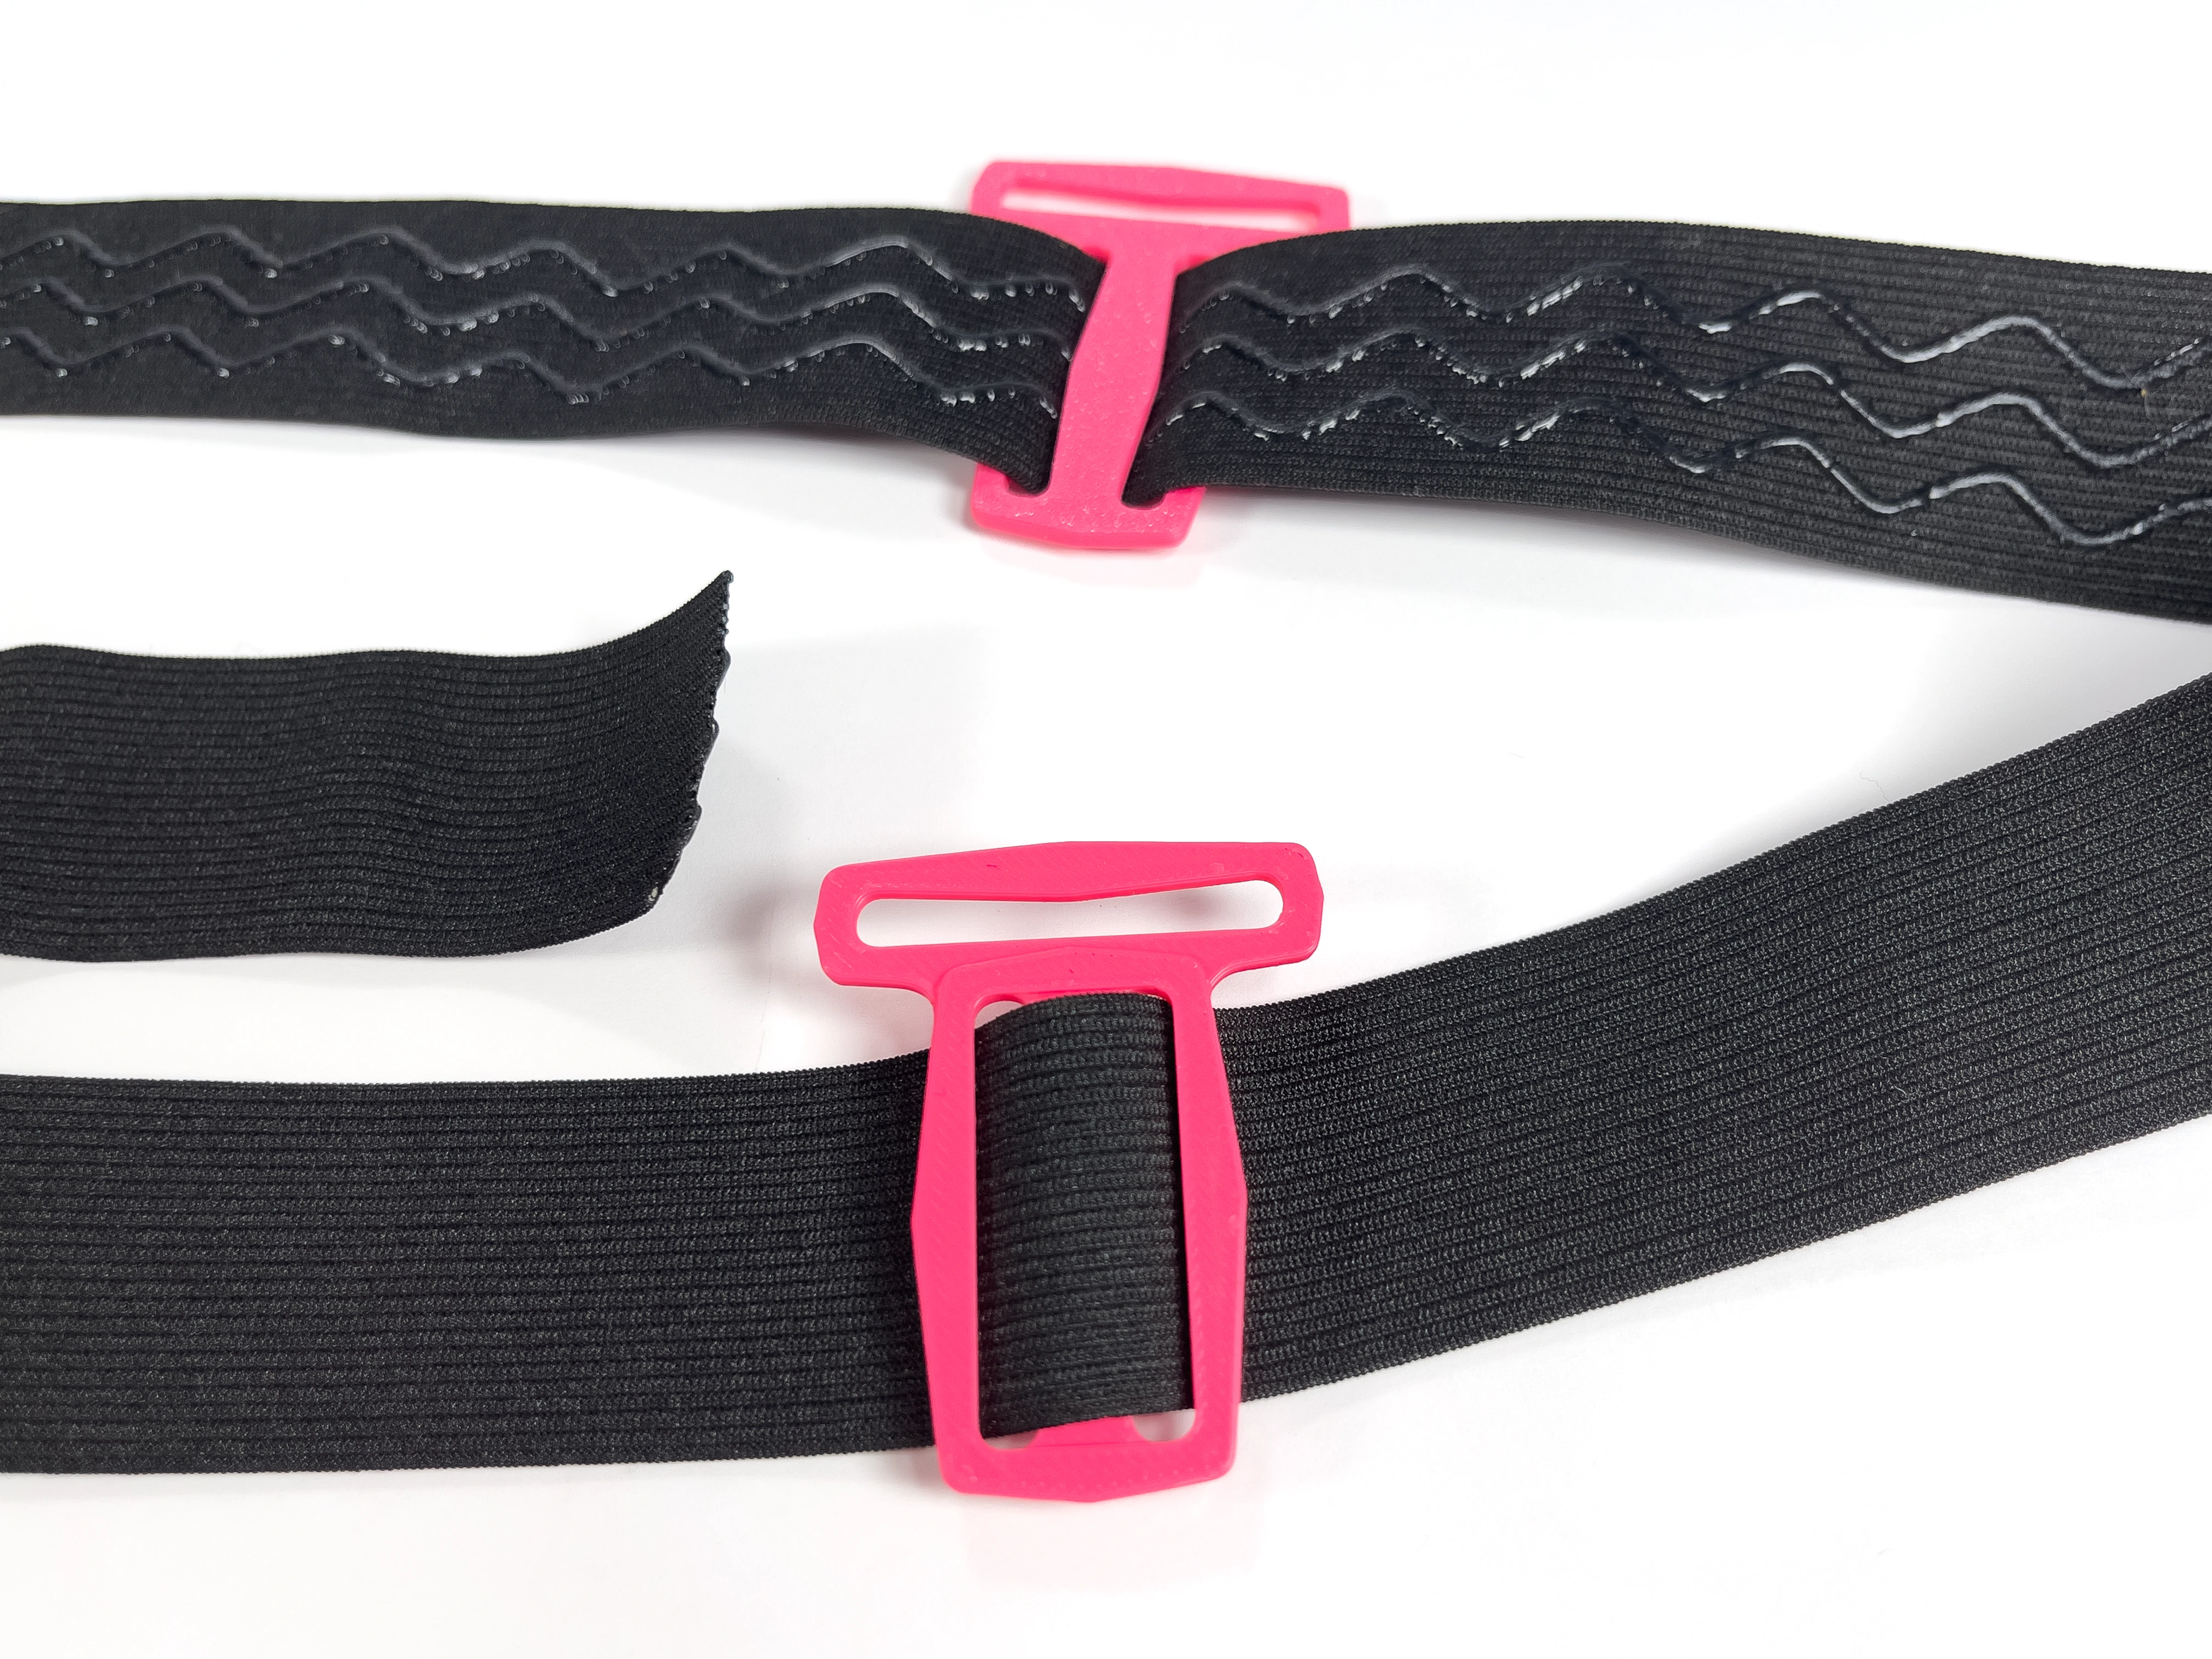
Attach all four 3-way Slides onto the strap that goes around your chest. Make sure that the silicon on the straps is touching the paw-print grips.
Align the 3-way Slides so that they are roughly in the same places as shown in the second image.
- 14
Attach Slide Mount
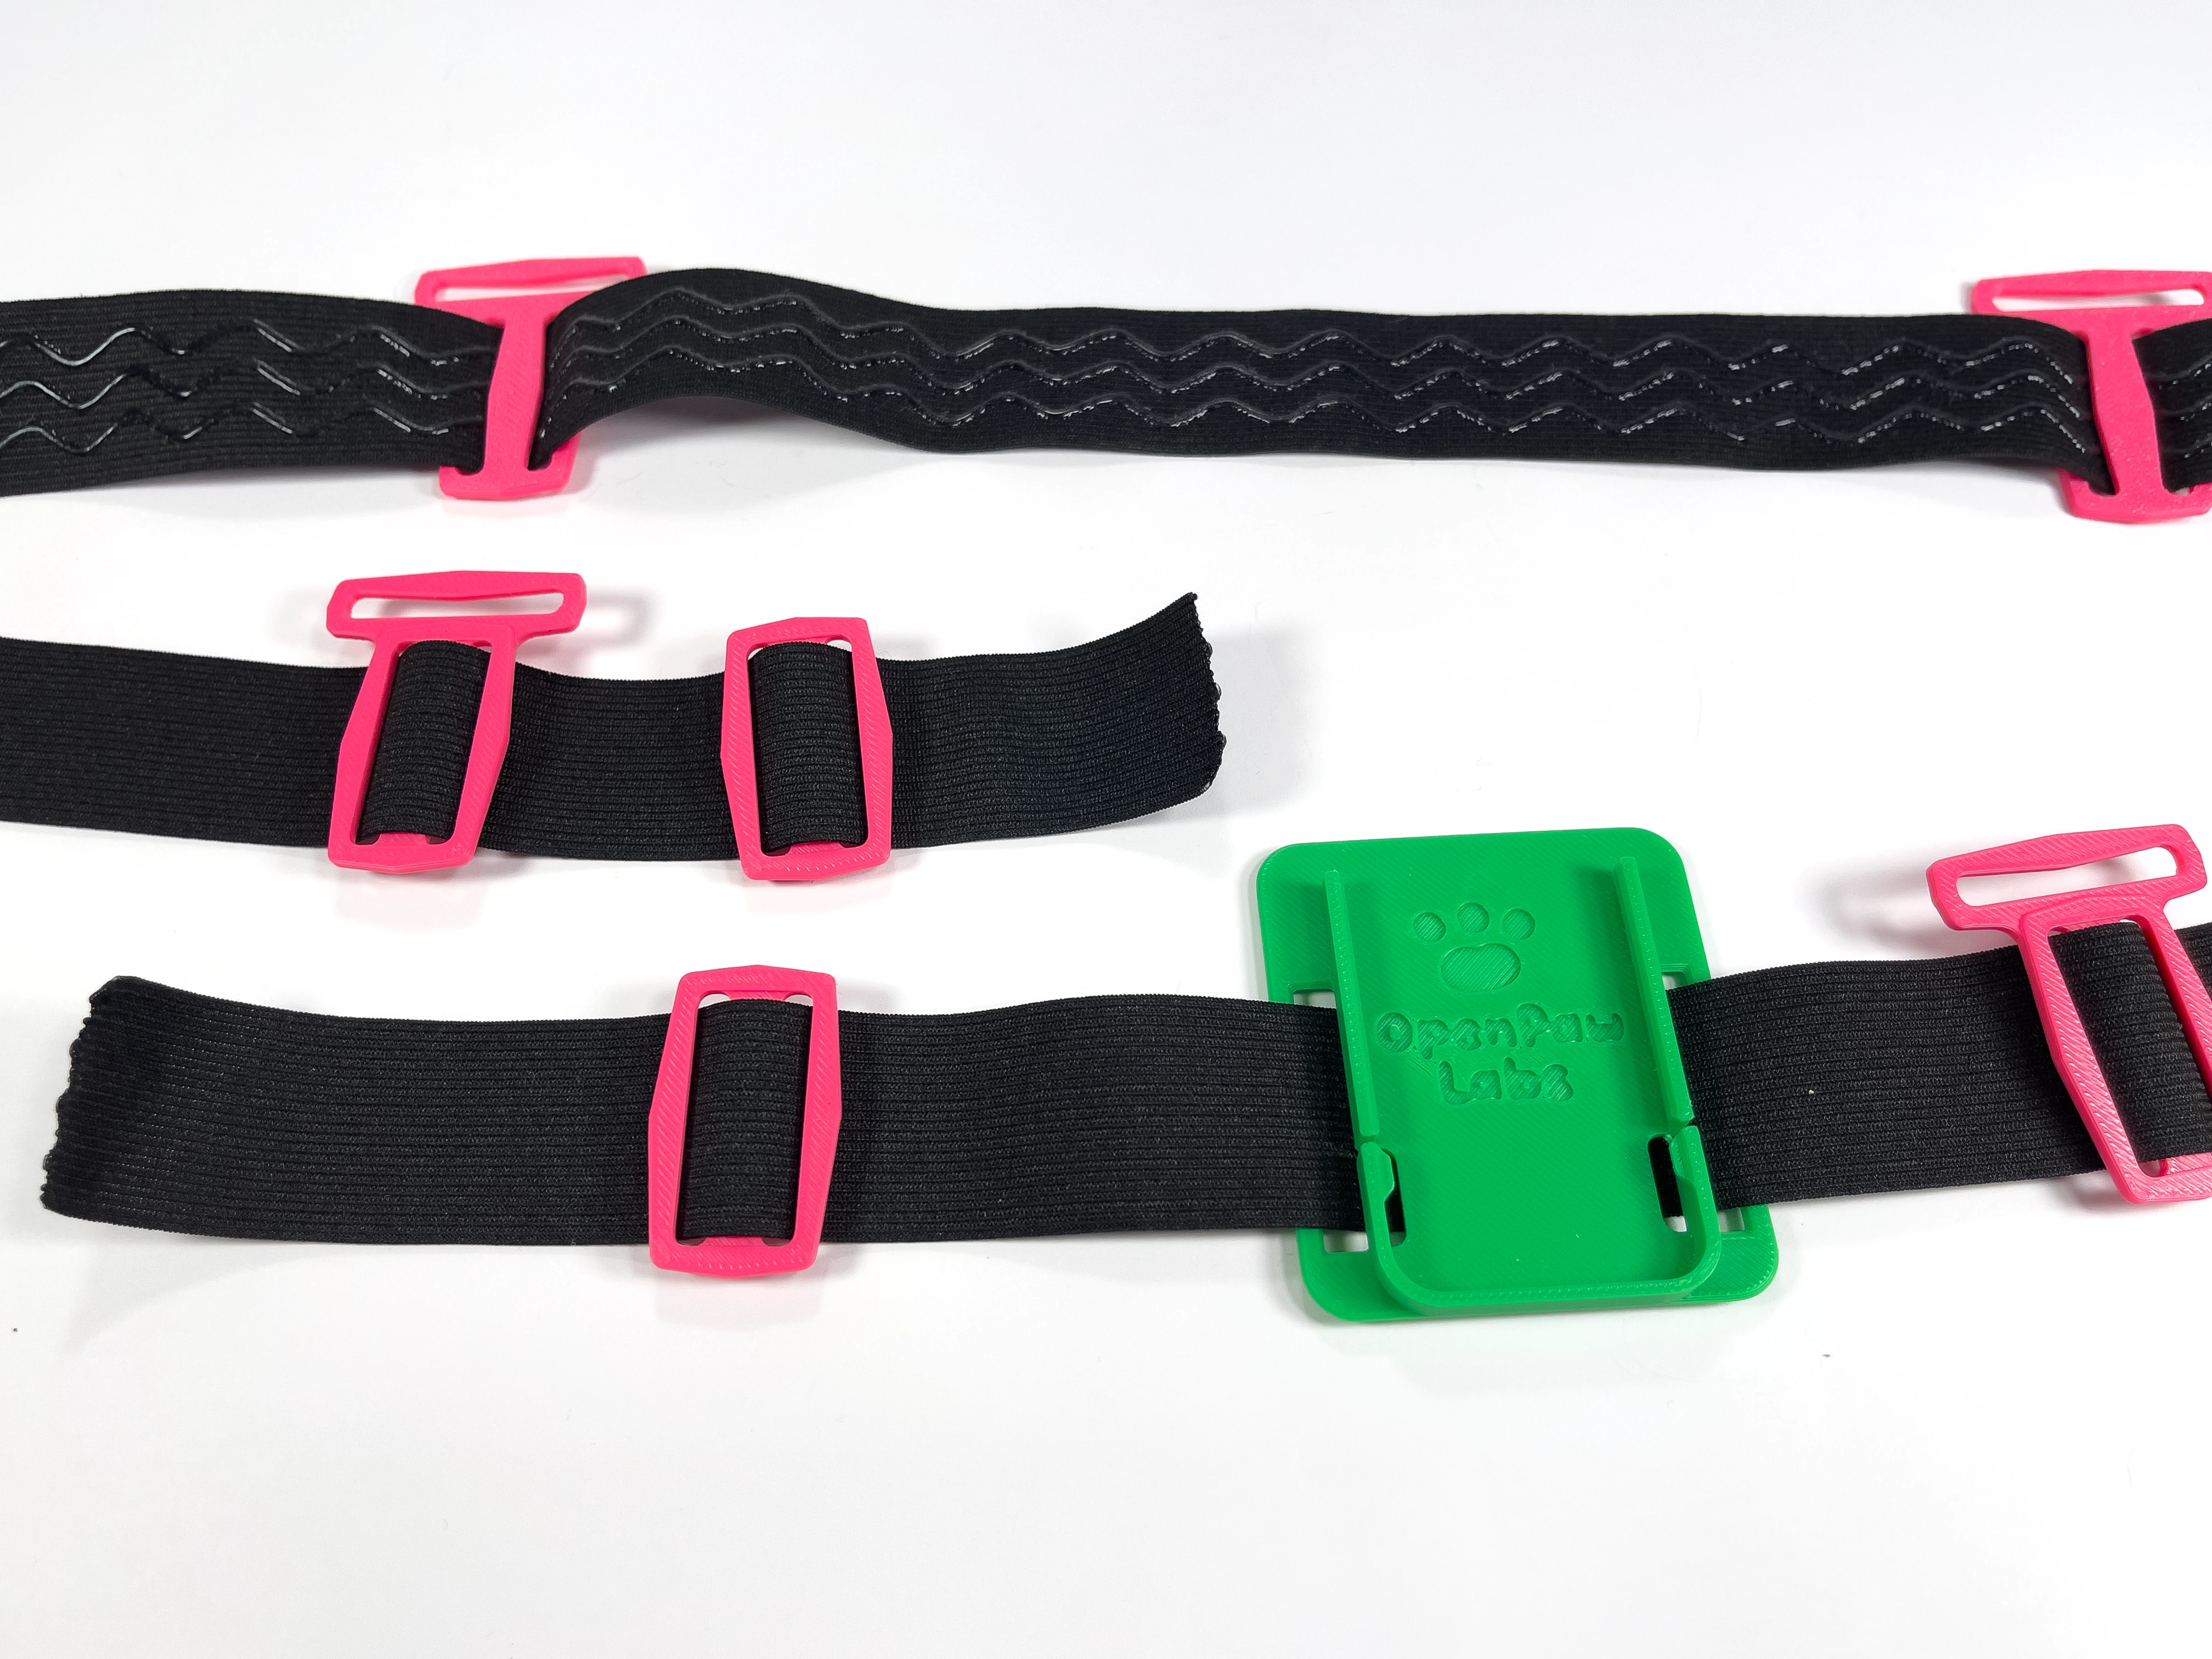
Adjust the 3-way Slides so that there is extra space on one side of the harness.
Attach the Tracker Slide mount onto the side of the harness that you added extra space to.
Attach a normal Slide to both sides of the Chest strap.
- 15
Attach Clasps
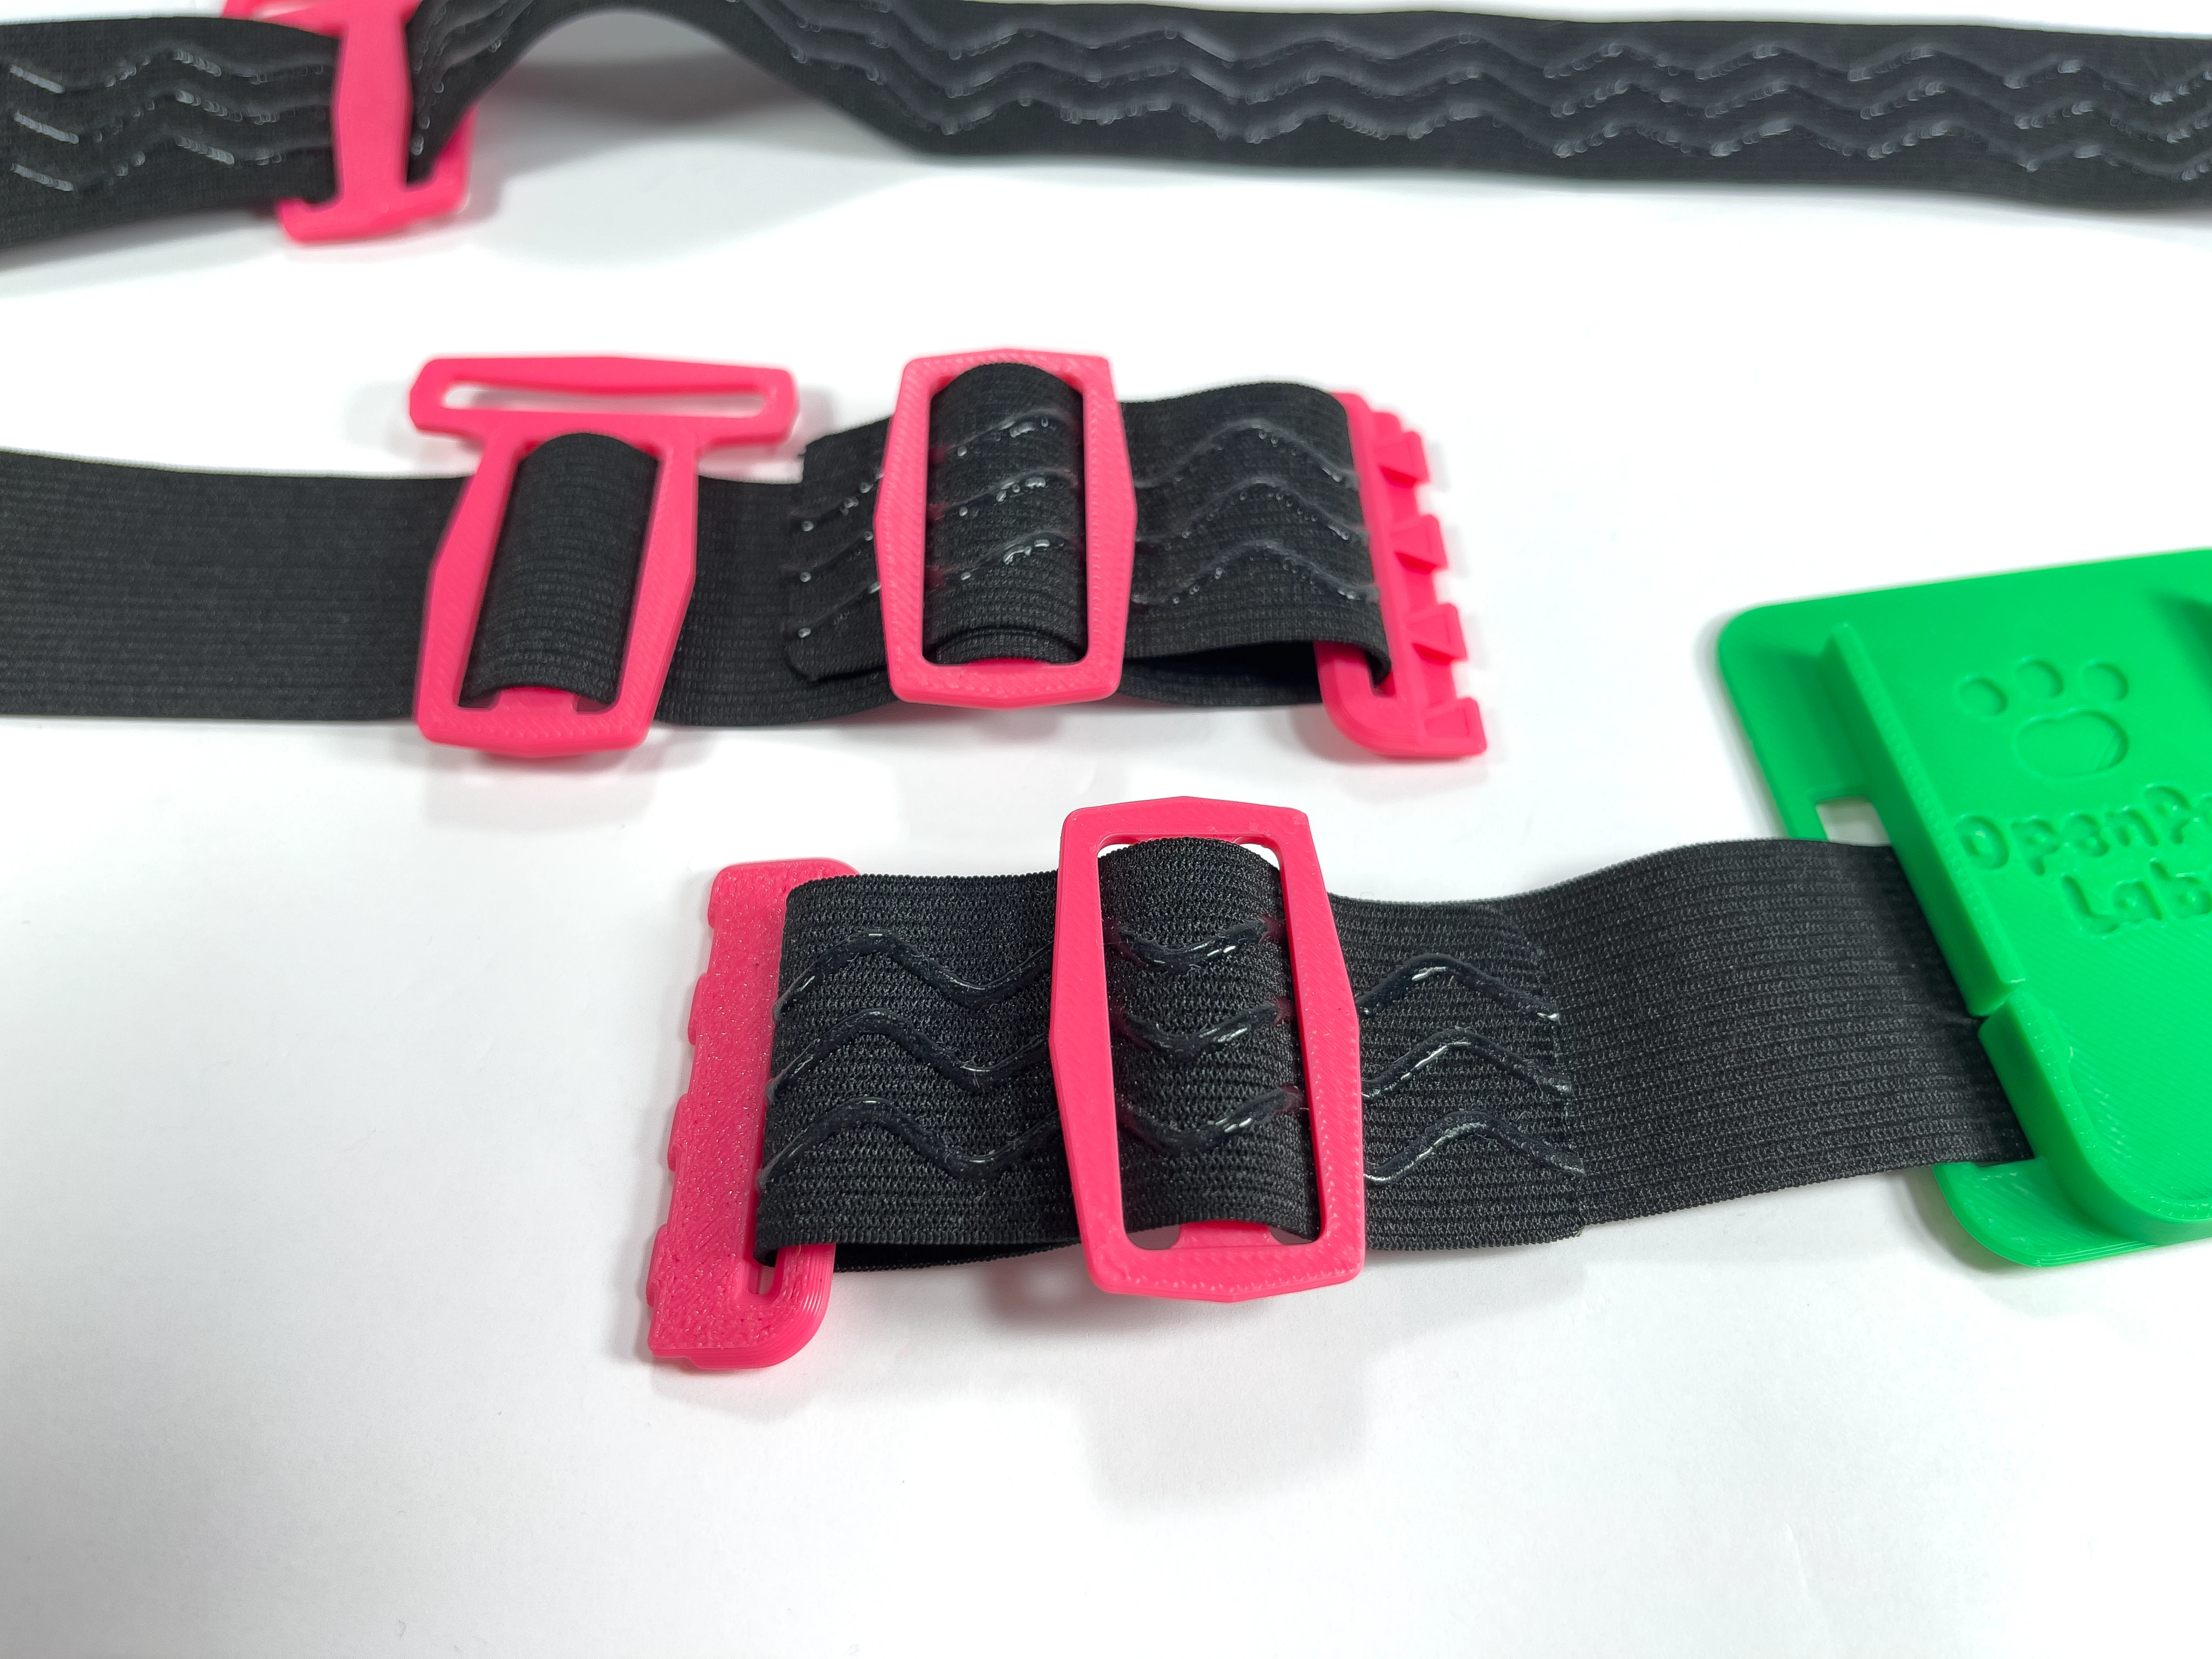
Attach the pair of Clasps to the ends of the chest strap, making sure that one side faces up, and the other side faces down.
Double check that the Clasps are able to latch on to each other.
- 16
Start Shoulder Strap
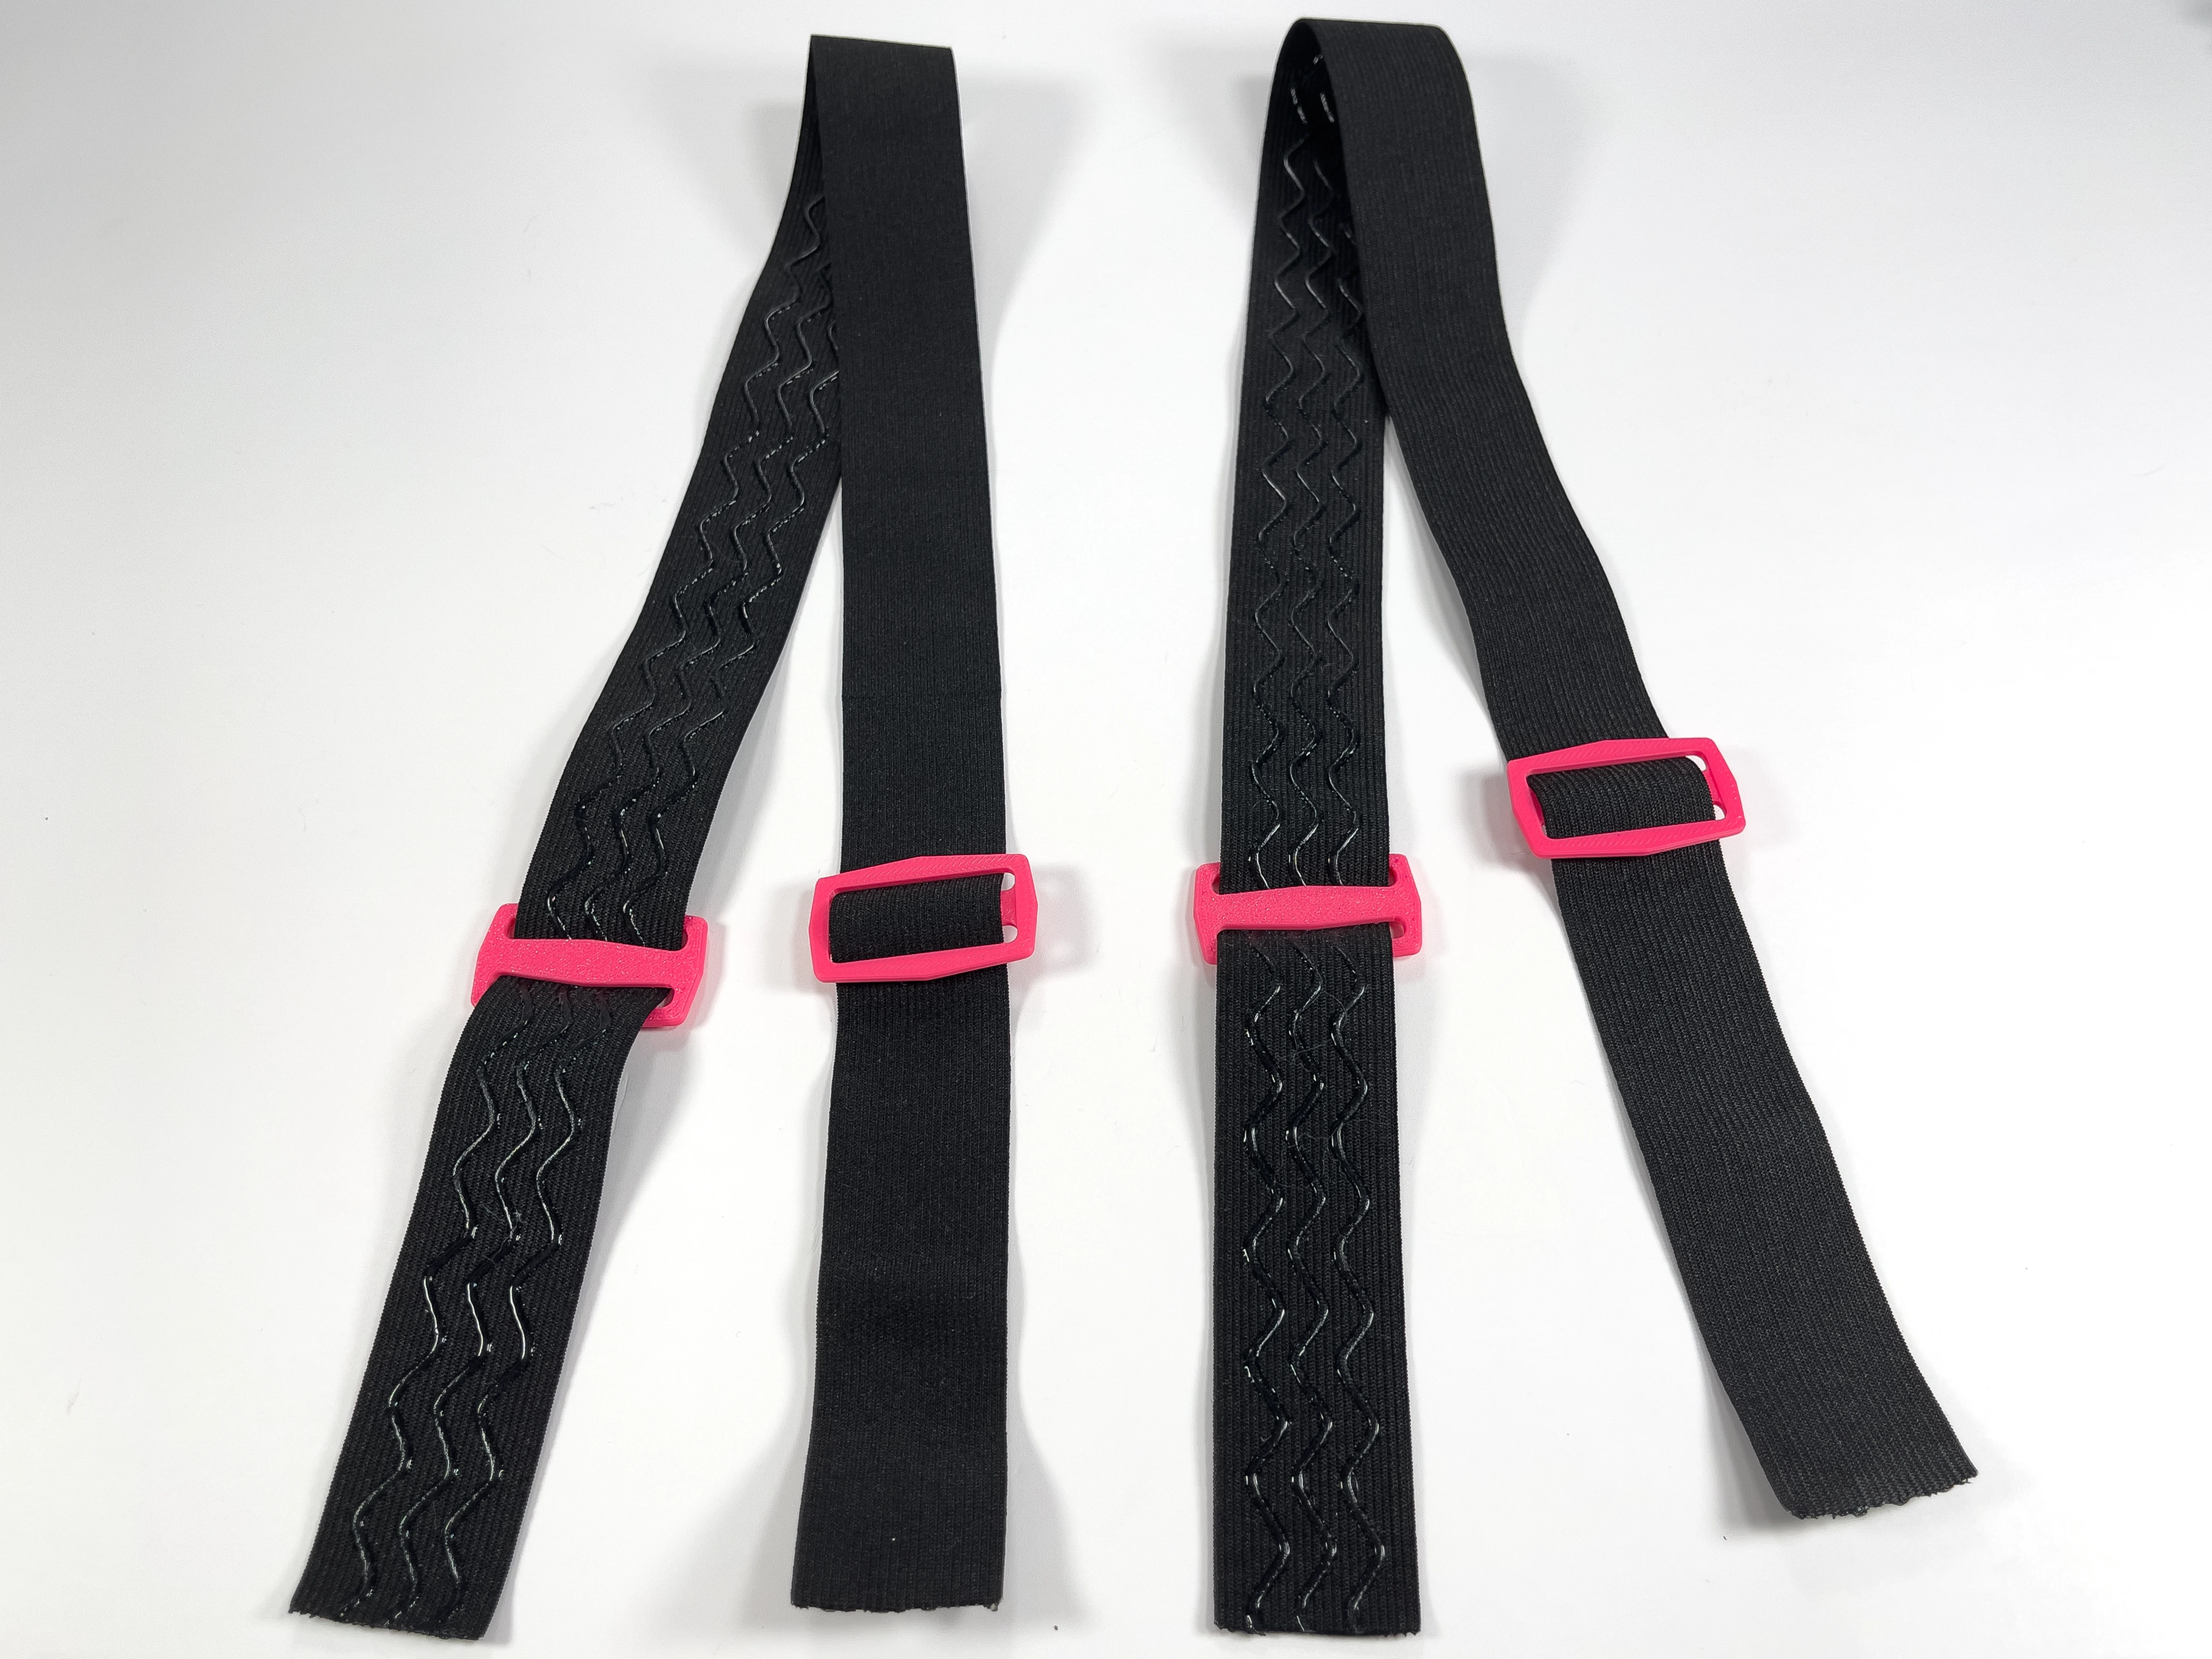
Thread normal Slides onto each end of the shoulder straps, again making sure that the silicon part of the strap is touching the paw-print grips.
Attach the shoulder straps to the 3-way slides in the same way as you would for a Clasp, threading the strap upwards through the 3-way slide.
Secure the strap end by threading it back through the normal Slides.
- 17
Finish Chest Harness
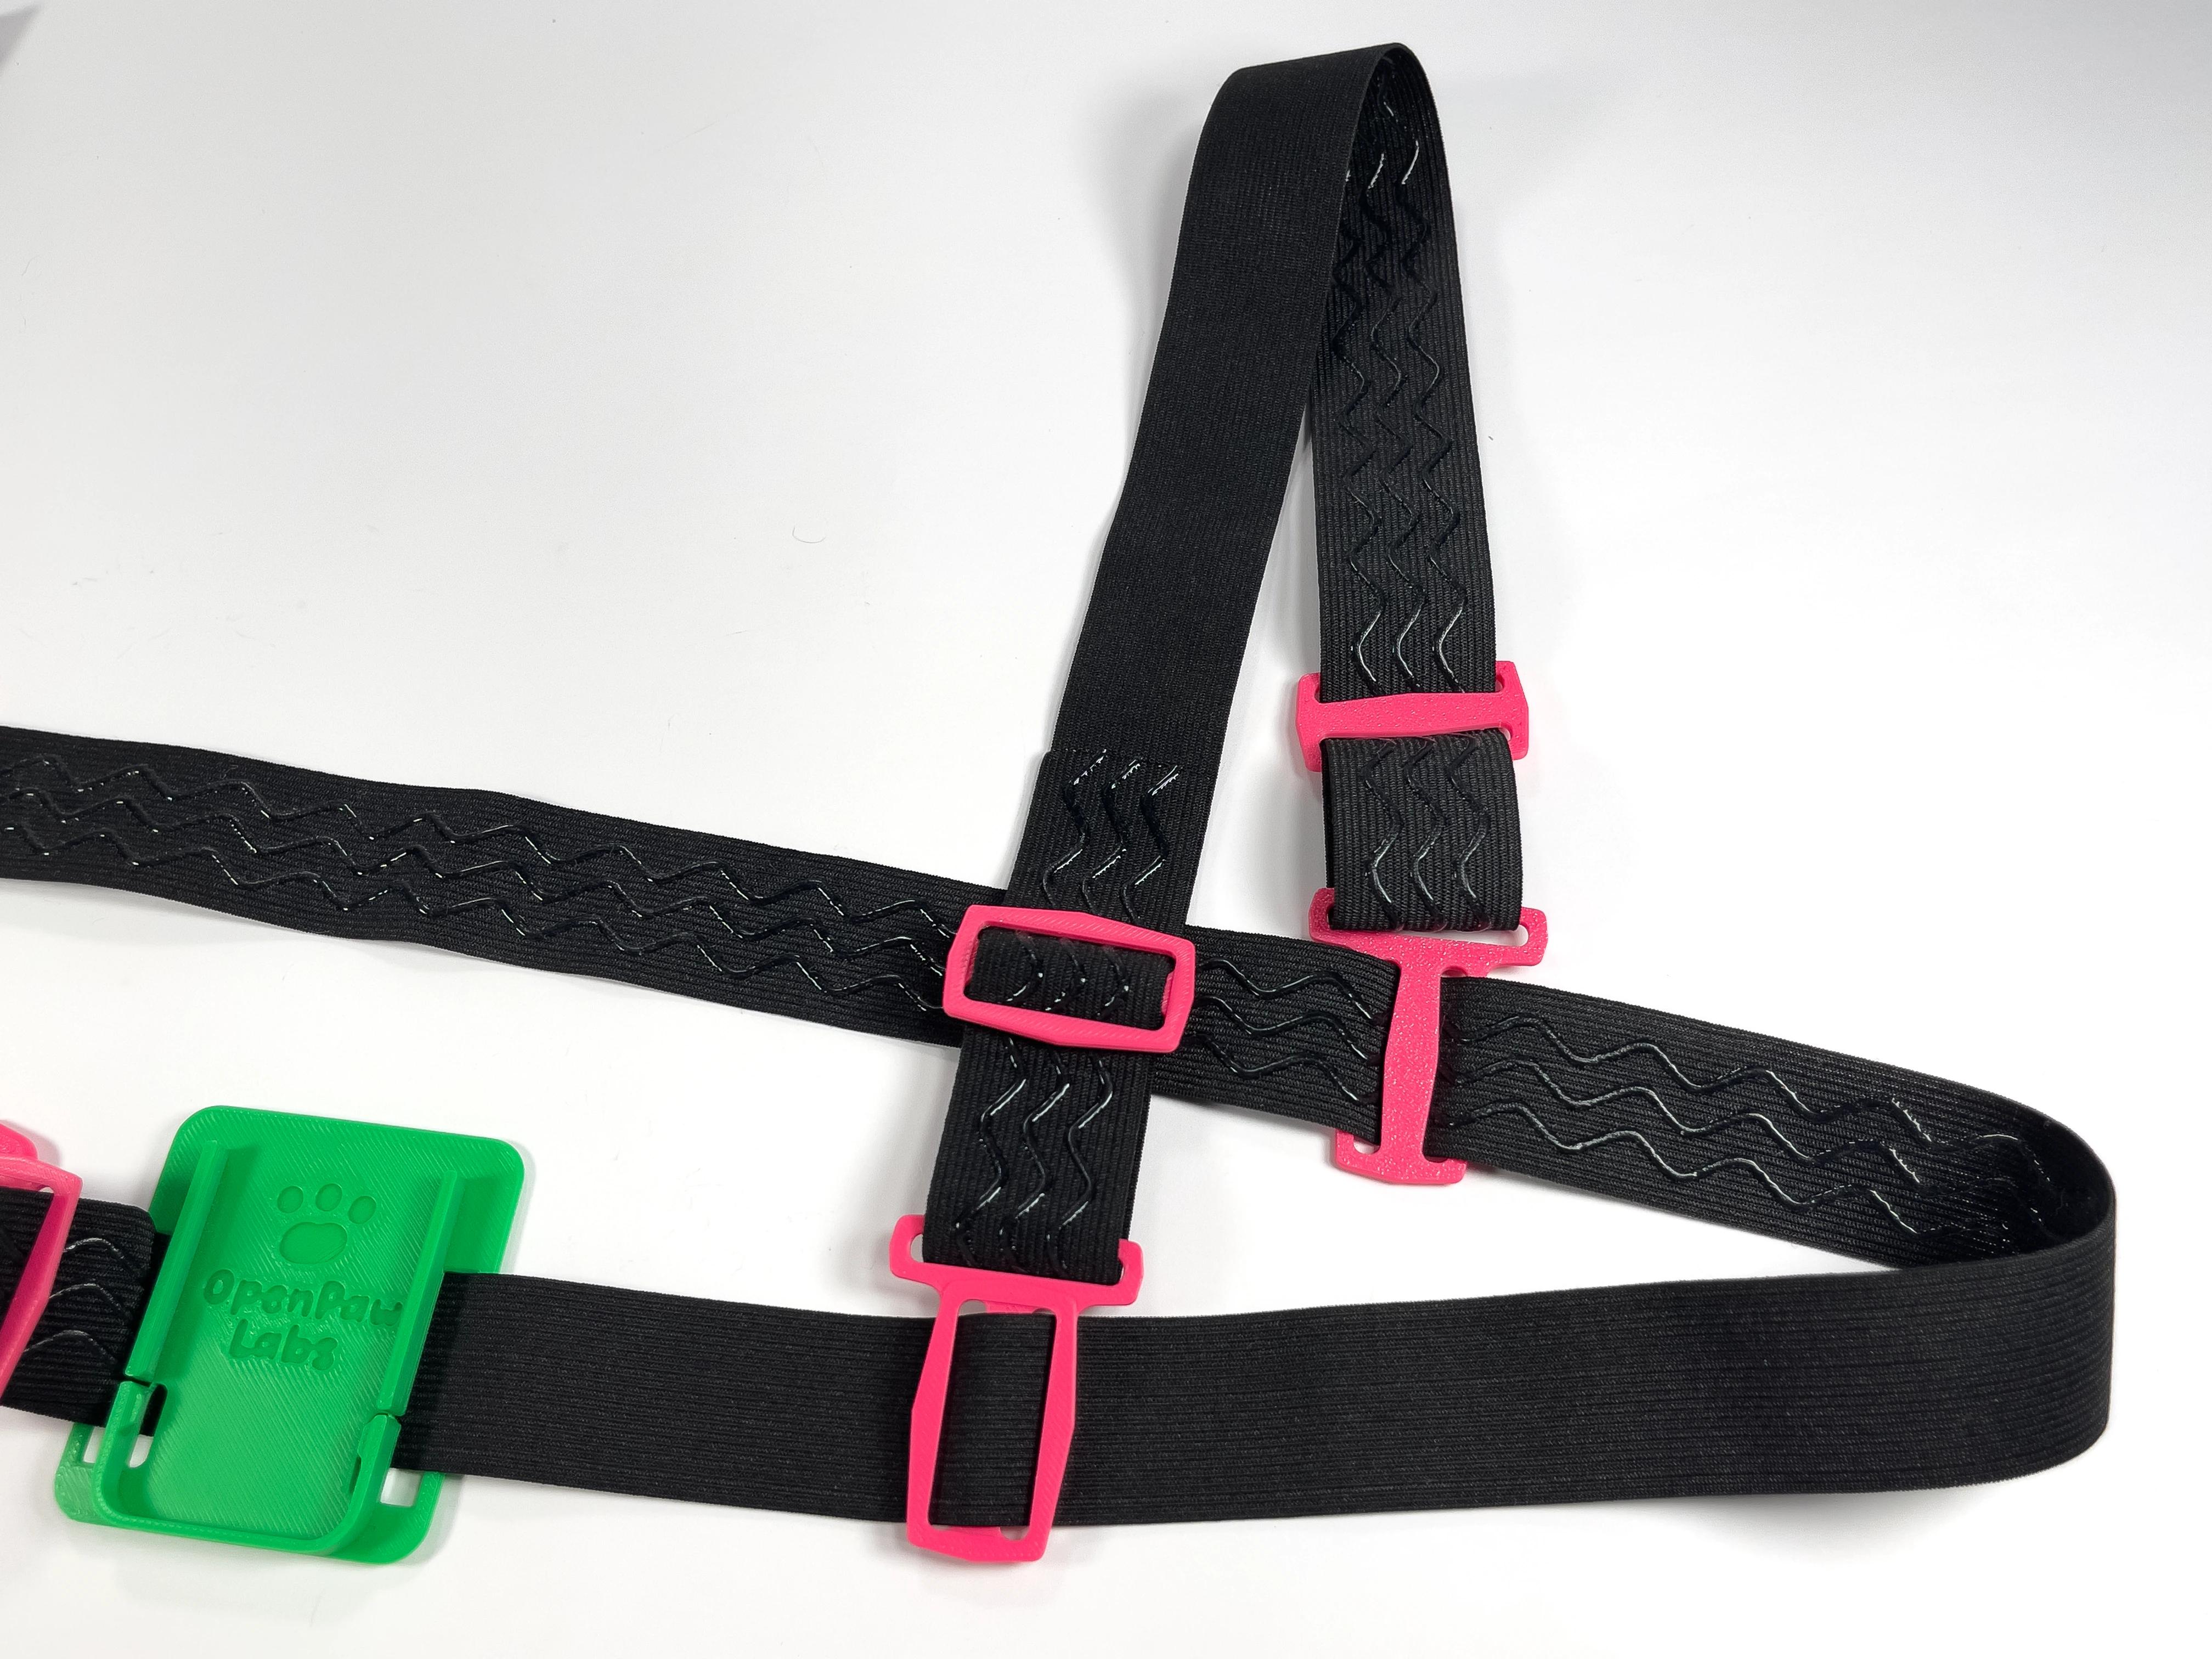
Finish attaching each shoulder strap onto the 3-way slides.
Put on the chest harness and adjust each of the 3-way slides so that they are well positioned. Tighten down the normal slides so that the harness fits snugly.
- Note:
If any of the straps are too long, take a moment to trim them down, making sure to leave 1-2in (25-50mm) of strap after each of the normal slides.
- 18
DIY Straps Complete!
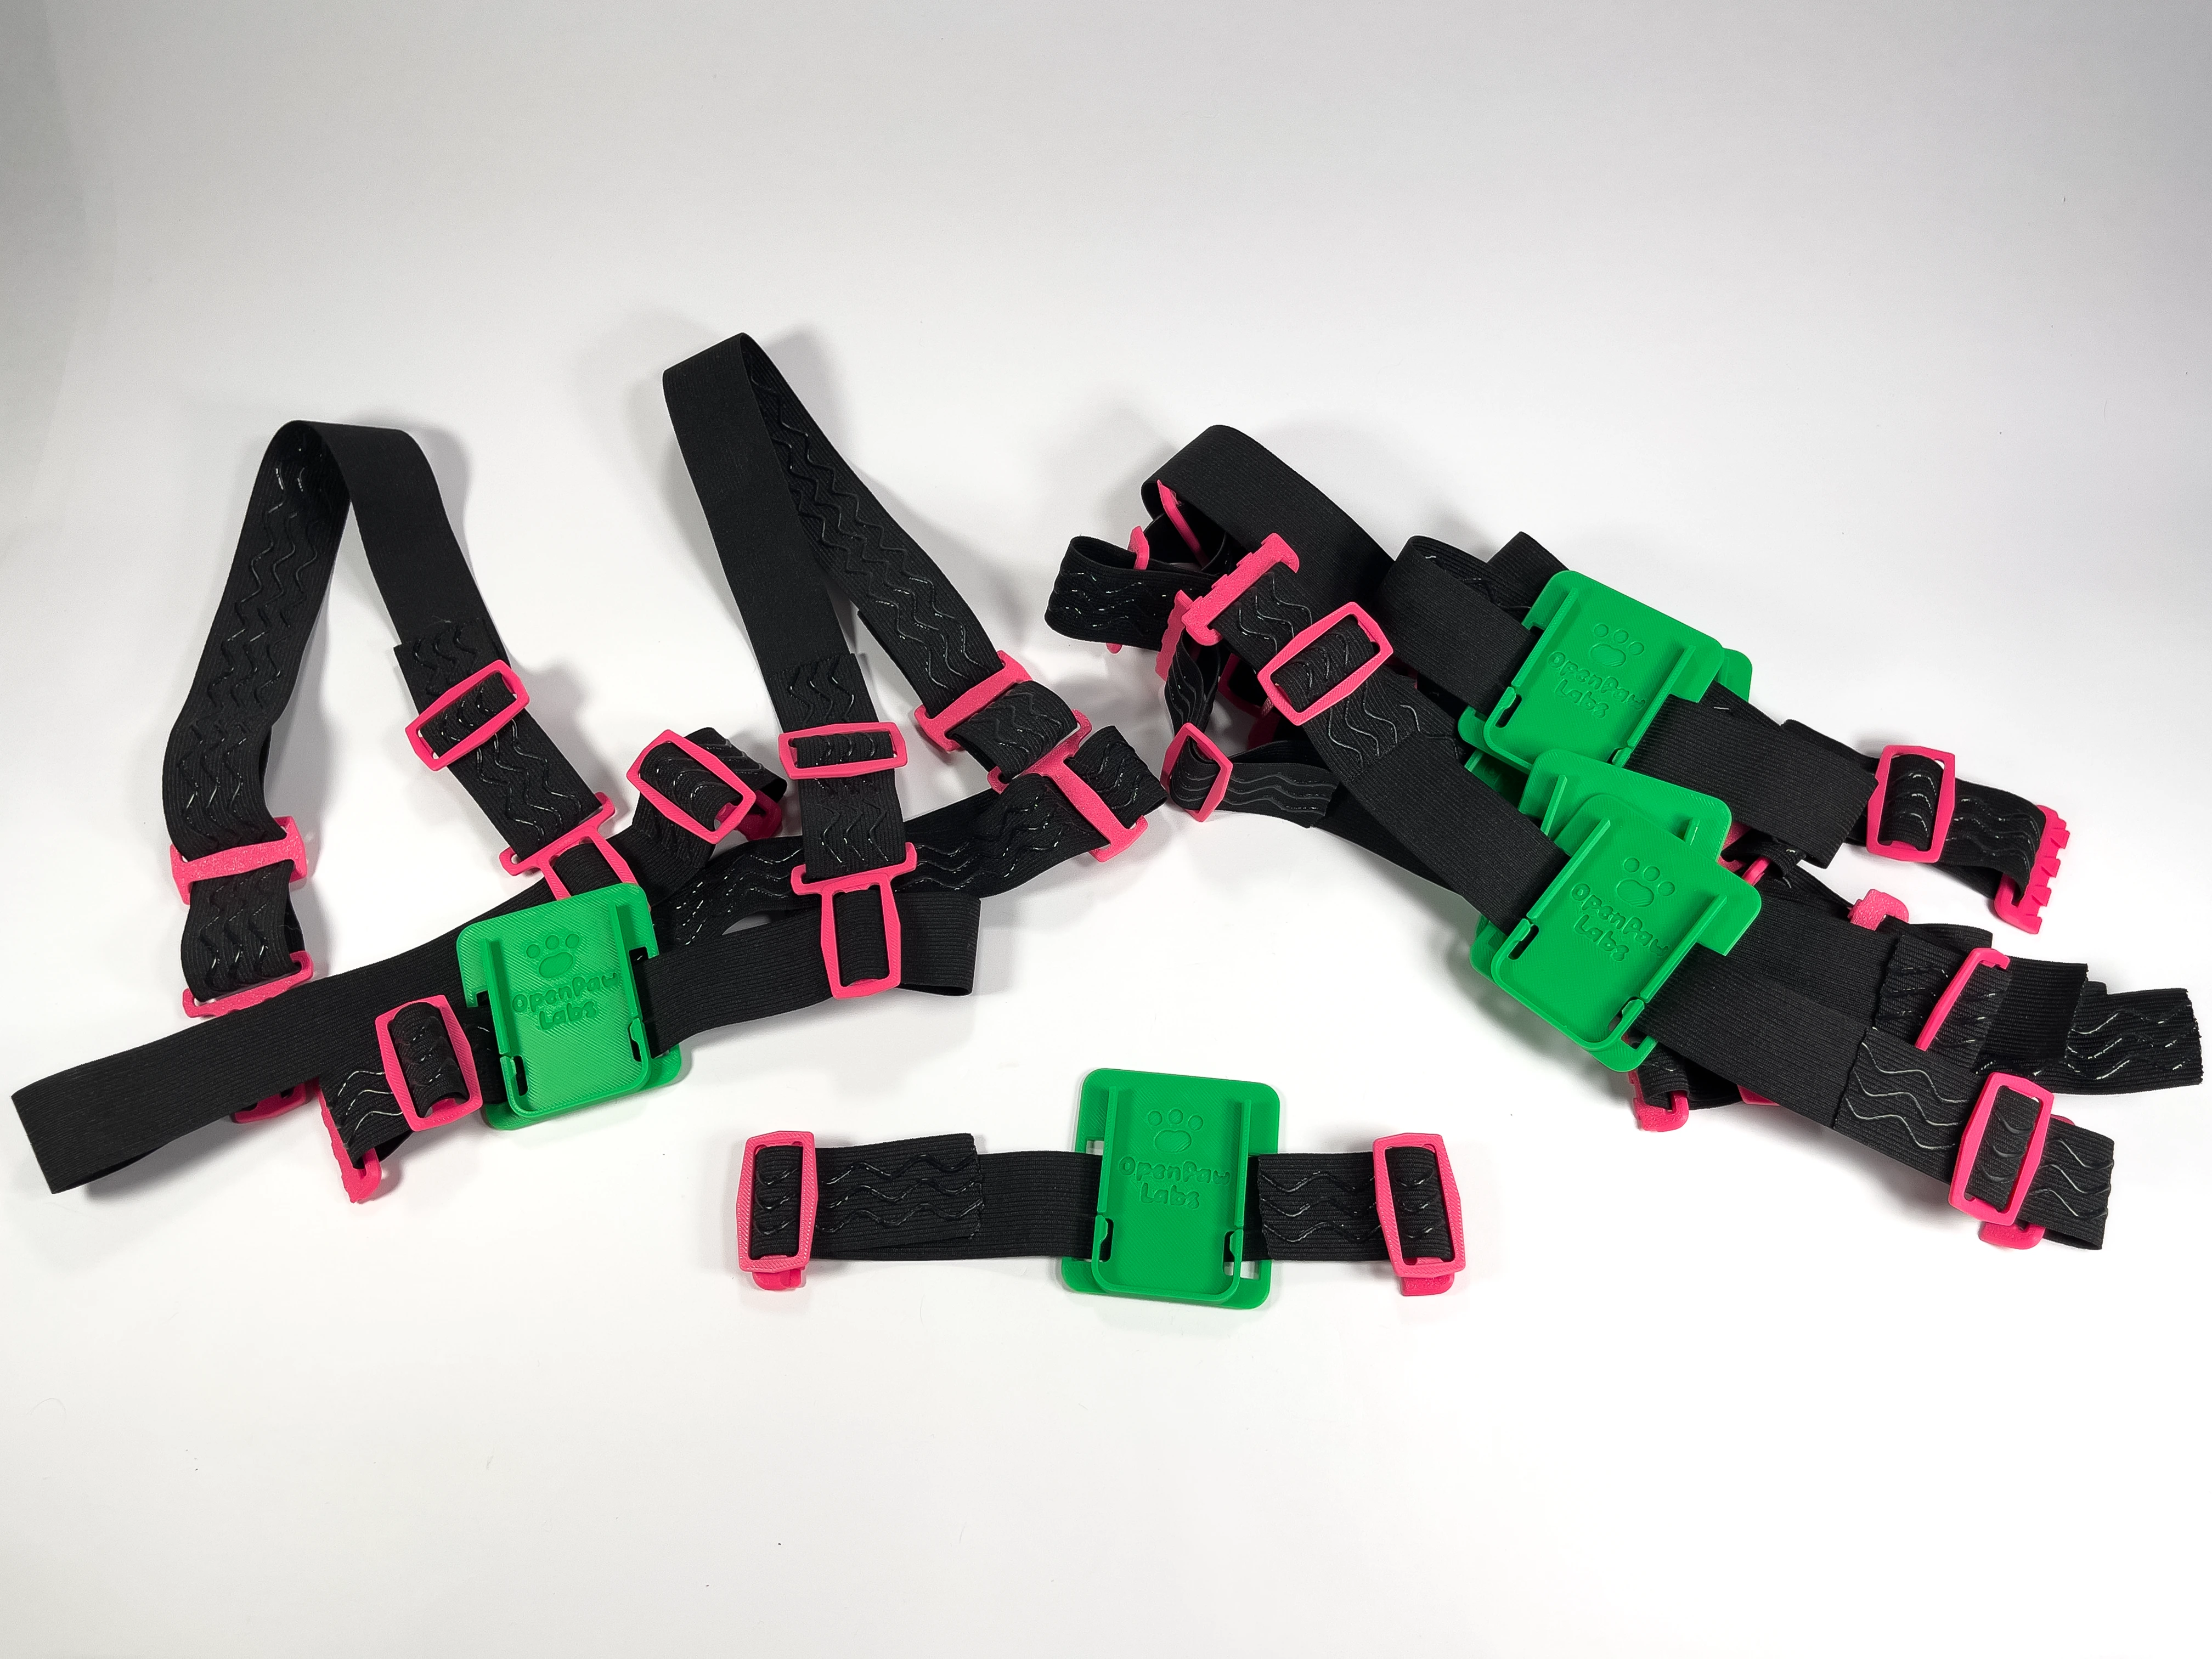
You should now have completed a full set of 8 straps! Put them all on, and make sure they fit nicely. Make any final adjustments to the strap lengths.
Move on to the next guide and get your software setup! You are so close to being in VR!

DIY Straps (Optional)
Moderate60 minutes
Make your own straps to save some money when building your FBT kit! You can assemble a full set of 8 straps in about an hour, and it will cost ~$15 total, making it extremely affordable. Makes an entire set that includes straps for Ankles, Thighs, Upper Arms, Hip, and Chest.


